Showing posts with label Recipes. Show all posts

Thursday, April 16, 2009

Market Fresh


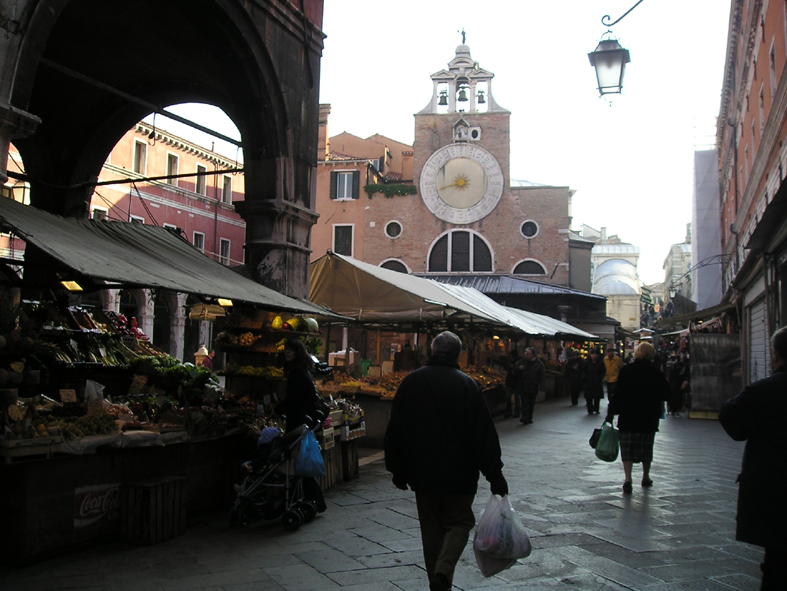
I love buying produce that is grown locally and organically for obvious reasons. Produce starts losing flavor the moment it is picked, some faster than other. Growing up in Venice, Italy, spoiled me in many ways, but I didn't realize how lucky I had it until I moved to the States, the land of supermarkets. Growing up I was lucky to taste amazingly fresh fruit and vegetables. My mom would go the farmers' market almost everyday, so everything she made tasted fantastic. Freshness is something I have experience for the past four years eating vegetables grown in my little garden. Last June I made a simple pasta with peas picked merely an hour earlier, baby onions, and parsley, also coming from the garden. The flavor of that dish was absolutely amazing. A quick sautée and they were ready. Most Italian dishes like Risi e Bisi, a traditional Venetian dish, have only few ingredients so freshness is a must. This year I planted twice as many pea plants to compensate for the peas I devour before they even reach the kitchen.

Marin County is an amazing place to live in, for million reasons, one being the availability of the best and freshest organic produce, grown within few miles of your home. We have two major weekly farmers' markets in San Rafael, on Thursday and Sunday mornings, and smaller ones located in other cities, some only running in the summer.

Today at the San Rafael Farmers Market there were the usual suspects, Star Route Farms, Marin Roots Farm, Full Belly Farm, to just name a few of these amazingly dedicated farmers. I first headed to get my fix of nettles but at Star Route they were sold out already, bummer! I bought some fava beans, spring onions, artichokes, and Italian kale.


My second stop was at Marin Roots Farm but they didn't have any nettles either, gone to seeds already. Instead I bought some kale flowerlets, which are awaiting inspiration. I am thinking to pair them with onions and lentils.


I also stopped at Della Fattoria stand and bought a wonderful rosemary, meyer lemon loaf, just gorgeous (this amazing bakery deserves a post of its own, coming soon.....).


Going to the market brings me an infusion of happiness, a sense of well being. Maybe because it brings back the feeling of walking through Venice's market stalls, buying some early spring offerings, waiting for inspiration to strike.

Happy Spring!

Tuesday, April 14, 2009

Tart with Leeks and Zucchini-Crostata ai Porri e Zucchine

A very cold weather front has hit the Bay Area, the temperature is ridiculously cold, but Spring is here nonetheless. My vegetable garden is in its third year and I am still learning what works and what doesn't. Last fall I planted loads of garlic since it grew really well before, and for the first time I tried leeks which proved to be a good crop too. The garlic bulbs haven't formed the little segments yet, so they need more time in the soil but he leeks are now big enough to justify harvesting them and that is what I did this morning. A tart that could be brought to a summer pic-nic is the perfect ending for these beauties.


Italians don't have the same love affair French have with leeks, so this vegetable doesn't appear too often on the menus. Maybe it is on the account on how we call them, Porri, which doesn't sound too appealing. This tart came to being when I was trying to use some leeks I had bought before knowing what to do with them. I decided to use them in a tart and since my fridge always has zucchini waiting to be used for one thing or another, the zucchini-leek combo was born. I then spiced the filling up with some chili flakes, added cream, eggs, some cheese and voila', a new dish was born. I have to admit the tart sounds/is very French indeed, but Italians will approve I am sure, especially since I used Parmigiano Reggiano.


This is another crowd pleaser I like to bring to parties or make for my catering clients. The tart dough is a typical Pate Brisée, with lots of butter and so delicious. The recipe is adapted from volume I of Mastering the Art of French Cooking by the venerable Julia Child.


Pate Brisée

2 cups of all purpose flour
1 teaspoon salt
1/4teaspoon sugar
6 ounces butter cut in small cubes
1/2 cup ice cold water.

I like to make this dough in a food processor as it is very quick. Add the dry ingredients to the bowl of a food processor, pulse to combine. Add the chilled butter and pulse on and off until the butter is the size of peas. Add the cold water with the machine running, then pulse on and off until the dough start to come together. Small pieces of butter should still be visible. Empty the dough on a floured counter and bring it together, do not over mix it. Wrap in plastic wrap and chill for 2 hours. The dough can be frozen for few weeks. Roll the dough to a 1/8 thickness, line a tart shell and freeze.

Tart Filling

2 medium leeks
2 medium zucchini
EVOO
chili flakes (to your taste)
parsley, finely chopped
1 cup heavy cream
2 large eggs
1/2 cup grated parmesan cheese
salt and pepper to taste

Slice and wash the leeks in cold water (click here to see a detailed post on how to prepare leeks). Heat the EVOO in a large pan, add the leeks and cook until translucent (like you would with onions). Add the zucchini and cook on medium heat until tender, seasoning with salt and pepper. Add the chili flakes and the parsley, and let cool. Mix the heavy cream with the eggs, add the cheese, and season with salt and pepper. Mix the cream mixture with the cooled vegetables and pour onto prepared tart shell. Bake at 375F until the filling is set and the crust is nicely browned. The above amounts will work for a 10", or a 8"x11" tart.

Buon Appetito!

Sunday, April 12, 2009

Colomba Pasquale-Easter Dove


A great group of accomplished bakers had the wonderful idea to bake a Colomba, a traditional Italian Easter bread. Natalia, Cinzia, Cinzia, Elra, Lien, Rosa, and Zorra then invited the blogsphere to join in to bake this challenging yet worth all the efforts bread. Cinzia of cindystar is hosting the event so check her site if you want to participate, the deadline is April 18th. The recipe belongs to a family of yeast breads found throughout Europe dating back to medieval times, studded with nuts, candied citrus peel and spices in some cases. Panettone, Stollen, Gubana, to name just a few, are all versions of this very rich dough, containing eggs, butter and sometimes milk. Reading all the mistakes, mishaps, and changes made by the bakers in the original group helped me decide what I wanted to do. Few bakers complained that the dough made from the original recipe was slow to rise on accounts of a sourdough starter. I have a starter in the fridge, so I could have tried it to be true to the bread, but I wanted to make sure I had a freshly baked Colomba on Easter Sunday, hence I used a recipe that used dry active yeast instead of a starter. I don't remember how I found this site but I used their recipe. The recipe is very well written, the dough behaved exactly as it said, and the aroma of the dough was amazing. The second to the last rise is an 8 to 10 hour process, so I refrigerated the dough with the intent of taking it out after our dinner with friends, and let it rise overnight. Do you guess what happened, right? Yes, I forgot to take it out when I got home at almost 11pm, but my brain must have been thinking about it thought because I woke up at 1am, jumped out of bed and saved the Colomba. I left it in the oven with the light on and went back to sleep. At 6 the dough had risen beautifully, was full of bubbles, nice long strands of gluten and all so sexy (yes, brioche dough is sexy). It felt amazingly soft and buttery and full of promises. It was easy to shape and it fit the molds perfectly. If you can't find the molds, you can bake it in a spring form pan, or visit Lien's site and check out her tutorial on how to make a mold from things you can easily find at you local store, pretty ingenious.

I checked the dough at 8 and it looked like it was not moving, so much to my desire to eat it for breakfast. The recipe says that it takes more than 3 hours. Patience.....At 10 it was almost there, it was going to be ready for lunch at that point.

At 11:30 I decided to call it, the dough was almost at the rim and looked nicely proofed. After thirty minutes I had to turn down the oven temperature to 350, and later to 330 because the top was getting too dark and the center of the dough was still really wet. The top came out a little too dark for my taste, I would lower the temperature earlier next time.


We never ate it at lunch because we went to visit some friends who were celebrating Passover so yeast was out of the question. The bread tasted perfect at dinner time, rich, moist, super delicious with the orange peel and the crunchy topping. It was denser than the commercial dove, but the traditional taste was all there. I would keep this recipe, and make it again, it was well worth the effort.


Thanks to all the wonderful bakers who came up with the idea of baking this bread and gave me the much needed push to try it again. Do you feel all the energy and passion coming out of your computer? Go make a Colomba now.


Colomba Pasquale

Easter Dove

These traditional holiday loaves are made in several easy steps over about 18 hours. We recommend doing steps one through four on the first day, since step four includes an eight- to ten-hour rising that, ideally, could be done overnight. Then finish the next day.

Yield: 2 loaves

Step 1 (Starter)
3 tablespoons plus 1 teaspoon cool water
1/4 teaspoon sugar
1 1/2 teaspoons dry yeast
7 tablespoons unbleached all purpose flour

Step 2
2/3 cup unbleached all purpose flour
4 large egg yolks
3 tablespoons cool water
2 teaspoons sugar

Step 3
6 tablespoons (3/4 stick) unsalted butter, room temperature (very soft), cut into 6 pieces
5 tablespoons sugar
2 large egg yolks
2 tablespoons lukewarm whole milk
1 tablespoon honey

2 1/4 cups unbleached all purpose flour

Step 4
1/2 cup cool water
1 1/2 teaspoons dry yeast
2 cups unbleached all purpose flour
1 cup (2 sticks) unsalted butter, room temperature (very soft), cut into 12 pieces
6 tablespoons sugar
4 large egg yolks
3 tablespoons lukewarm whole milk
2 teaspoons vanilla extract
1 1/2 teaspoons fine sea salt
1 1/2 cups (about 10 oz.) chopped candied orange peel ( can be found in some specialty foods stores)

Step 5
1/2 cup (about) all purpose flour
2 dove-shaped paper baking molds or two buttered and floured ten-inch-diameter cheesecake pans

Step 6 (Glaze and baking)
1 cup sugar
1/2 cup whole unblanched almonds
3 large egg whites
1/4 teaspoon almond extract
1 1/3 cups sliced almonds
Powdered sugar

For step 1 (Making starter):
Combine water and sugar in bowl of a heavy duty mixer. Stir in yeast. Let stand until yeast dissolves, about 10 minutes. Using rubber spatula, mix in flour (dough will be firm). Cover bowl with plastic wrap. Let starter rise until puffy, about 45 minutes. (Initially, the starter is firm and compact, but it softens and becomes puffy and spongy after rising.)

For step 2:
Attach dough hook to mixer. Add all ingredients in step 2 to starter. Beat until blended, scraping down sides of bowl often, about 5 minutes (dough will be soft and thick). Scrape dough off hook; remove hook. Cover bowl with plastic. Let dough rise at room temperature until puffy and bubbly on top, about 1 hour. The dough will look thick, shiny, and slightly puffed.

For step 3:
Reattach clean dough hook. Add first 5 ingredients in step 3 to dough; beat until blended. Add flour. Beat at low speed until smooth, scraping down bowl and hook often, about 5 minutes (dough will be firm and compact). Scrape dough off hook; remove hook. Cover bowl with plastic; let dough rise at room temperature until lighter in texture and slightly puffed, about 3 1/2 hours. The dough will double in volume and become lighter in texture but less glossy.

For step 4:
Reattach clean dough hook. Mix water and yeast in small cup. Let stand until yeast dissolves, about 10 minutes; add to dough. Add 1 1/3 cups flour, half of butter, sugar, and 2 yolks; beat until dough is smooth, about 3 minutes. Scrape down dough hook and sides of bowl. Add remaining 2 yolks, milk, vanilla extract, and salt. Beat at low speed until blended, about 3 minutes. Scrape down hook. Add remaining 2/3 cup flour, remaining butter, and orange peel. Beat dough until well blended, about 5 minutes. Scrape dough into very large (at least 4-quart) buttered bowl. Cover with plastic. Let dough rise at room temperature until doubled and indentation remains when 2 fingers are pressed about 1/4 inch into dough, 8 to 10 hours.

For step 5:
Sprinkle 1/2 cup flour onto work surface. Scrape dough out onto floured work surface (dough will be soft and sticky). Gently toss dough in flour until easy to handle. Brush away excess flour. Divide dough into 3 equal pieces. Divide 1 piece in half; shape each half into 10-inch-long log. Arrange 1 log crosswise in each paper baking mold, curving ends to fit. Roll each remaining dough piece into 11-inch-long log, slightly tapered at ends. Place 1 log across dough in each mold. (If using 2 cheesecake pans, divide dough in half; place half in each prepared pan). Cover molds (or pans) with plastic. Let stand at room temperature until dough rises to top of each mold and indentation remains when 2 fingers are pressed about 1/4 inch into dough, about 3 1/4 hours.

For step 6 (Glaze and baking):
Position rack in bottom third of oven and preheat to 375 F. Finely grind sugar and whole almonds in a food processon. Add egg whites and almond extract; blend 10 seconds. Peel plastic off dough in molds. Spoon half of almond glaze over top of each. Sprinkle each with sliced almonds. Sift powdered sugar over. Slide rimless baking sheet under molds; slide molds directly onto oven rack.

Bake breads until brown on top and slender wooden skewer inserted into center comes out clean, about 45 minutes. Cool breads completely on rack. (Can be made ahead. Wrap; let stand at room temperature up to 2 days or freeze up to 1 week.


Buona Pasqua!


PS I submitted this post to the amazing weekly event organized by YeastSpotting, Zorra is the host this week. To see how to participate check Susan's web site.

Saturday, April 11, 2009

Candied Orange Peel

This year I decided to try to make Colomba Pasquale again. I made it once before without the proper mold, and despite looking awful it was pretty tasty. This time I am prepared, equipped with the colomba paper molds I bought a while ago in a local kitchen supply store. Now the time has come, just in time for Easter, to make this wonderful bread millions of people will be eating in Italy on Easter Sunday.

The dough is now rising, waiting for the fourth addition of ingredients, and more yeast to carry along the rise of this super rich dough. As I was mixing the dough, it dawned on me that I didn't have enough candied peel, a crucial ingredient in this bread. No time was lost when I remember the blood oranges I juiced yesterday which I promptly rescued from the compost bucket and proceeded to candy. No, they were not in the compost pile, just in the compost bucket I keep next to the stove, there were totally fine, plus they will be boiled, right?

Candying citrus peel is easier that most people think, water and sugar are the only ingredients required, together with some patience. Two years ago, almost to the exact day (it was Easter night), I went to visit one of my dearest friends, Paola, and her family in Roncan, a tiny village located at the foothill of the Alps, north of Venice. We started eating oranges, and as the peel started piling up I decided to candy it, all I needed was water and sugar, right? It was one of those unforgettable moments, spent with my oldest and dearest friends, in their beautiful although rustic kitchen. Needless to say the peel didn't last until the next day, we ate it on the spot.

Depending on how thin the peel is cut, there are many ways to candy it. I simply covered the juiced halves with cold water and boiled them until tender to the fork (for citrus that has a much thicker pith, a 2 or 3 step blanching is required). After the oranges had cooled down, I removed most of the pith with a spoon, and then cut the skin in crescents with a sharp knife. The candying took a while since the skin was thick, maybe 30 minutes or more. The purpose of boiling the skin in simple syrup is to exchange the water in the peel with sugar, a natural preservative. This way the candied peel lasts for a long time in the refrigerator.

Once the crescents are completely translucent and the syrup has thickened, the peel is drained and dried, sometimes overnight. This step is important because it decreases the amount of sugar that will stick to the peel, for a much better end result. I didn't wait that long though since I will need the peel in the next hour.

Tossed in sugar, the peel is hard to resist, I must admit.


Candied Citrus Peel

You will need peel of citrus fruit, such as lemons, oranges, mandarins, grapefruit, etc. (don't candy different fruit at the same time as they vary in thickness and will take different times).
Simple Syrup (1:1 ratio between water and sugar, in cups), enough to cover the peel.

For thick skins that have a lot of white pith, blanch the peel twice or three times in boiling water (add the peel to boiling water, blanch few seconds, drain and cool in ice water). On the last blanching, continue cooking, barely simmering, until the peel feels soft when cut with the tip of a knife. Once cooled remove most of the white bitter pith, with a knife or a spoon. Cut in desired shape and size.

To make the simple syrup, pour the water in a pan with a heavy bottom, dissolve the sugar, and bring to a boil. Add the drained peel, and cook just simmering, covered with a disk of parchment paper, until translucent.

Drain the peel from the syrup, dry for few hours to overnight, and toss in granular sugar. Store in an airtight container in the refrigerator. The peel keeps for weeks.

If you have a zester, the peel can be removed in thin strips, with barely any pith. They only need to be blanched twice, and don't need to be boiled at all.

Before candying, the strips can be cut in very thin julienne strips. When the peel is very thin only take 10-15 minutes to cook in the syrup.

Tuesday, April 7, 2009

Paper Chef 39-Poached Salmon with Blackberry Sauce, Bulgur Salad and Artichokes


I love artichokes! When I saw that they were in the list of ingredients for this month's Paper Chef I got really eager to start cooking. In Venice, just about now, you can find the most tender and flavorful baby artichokes at any market stand. Most artichokes found throughout Venice are grown in the island of Sant'Erasmo, where most of the produce comes from since the time of the Dogi. Sant'Erasmo is one the biggest islands in the Venetian lagoon, besides Venice proper, and is relatively unknown to tourism. The best artichokes are called castraure in the Venetian dialect, meaning little castrated things, and are the flowers that sprout on the side, once the main flower is cut off. Castraure are deep purple and so tender that they can be eaten raw, thinly sliced with olive oil and lemon juice. Fried artichokes are also one of my favorite ways of eating artichokes, I can taste them just thinking about it. In Venice you can also find big artichoke hearts, called fondi di carciofo, and best cooked with garlic, olive oil, and a sprinkle of parsley. Nearby Piazza Santa Margherita, where I used to live, there is a boat referred to as La Barca, a burcio precisely, filled to the rim with vegetables of all sorts (click on burcio to see a photo of the actual boat). I can picture in my head one of the brothers who own the business, perched on a wooden case in a nearby boat, busy removing the leaves of the artichokes and tossing fondi in a huge plastic bucket full of lemony water. The memories.....


This month's judge for PC is Adrienne at Hungry Bruno. The three randomly picked ingredients were blackberries, artichokes, and bulgar, and Adrienne threw in salmon as the fourth ingredient. I knew immediately what to do with the bulgar and the artichokes, but only this morning I figure out how to incorporate the other two ingredients in the dish. I found some blackberries that weren't too ripe and pureed them, but when I tasted the puree I had no idea how to incorporate it into the dish. Luckily I run into a friend of mine who is a chef and he suggested adding some balsamic to it to bring out the acidity. I still had no clue on how to make the puree into a sauce though. Then I visited Ilva's site and inspiration struck when she mentioned blackberries in a vinaigrette. I decided to cook some shallots, add some red wine, reduce the sauce down with a piece of cinnamon bark, add some butter, and go from it. When the wine was nicely reduced I added few tablespoons of blackberry puree until I could taste them, but because it was way too acidic I added some balsamic vinegar and a pinch of sugar to add sweetness. It worked! Now that I had a great tasting sauce to use on the salmon I decided to poach the fish to give it a more delicate taste that would not interfere with the stronger sauce. I have to say that I had no hope that blackberries would work with salmon, but with few other ingredients an idea was born. Thank you Ilva for the inspiration.

All the recipe amounts are approximated since I didn't measure anything except the bulgar.

Bulgar salad
Cook the bulgar wheat in 2 parts of boiling water until soft (1 cup to 2 cups of water). Add some EVOO, salt, parsley, and 1 minced shallot.

Artichokes
1 pound baby artichokes
2 garlic cloves
EVOO
salt to taste
1 tablespoon minced parsley

Wash the artichokes, peel the stem, remove the hard leaves, and cut in half. Sautee the garlic in EVOO, add the artichokes, and cook covered at low heat until tender (you may need to add some water once in a while). Add salt to taste, and sprinkle with fresh parsley.

Poached Salmon
Cover the salmon with sliced shallots and poach in water and two tablespoon of EVOO. Salt to taste.

Blackberry sauce
Mince a medium shallot and sautee in EVOO until translucent. Add a glass of red wine, a small piece of cinnamon bark, and reduce the sauce until thick. Add a tablespoon of butter, and 1/2 cup of blackberry puree, warm the sauce through, then add 2 teaspoons of balsamic vinegar and a pinch of sugar. Salt to taste. All the ingredients are approximated in amounts, so add less of everything and adjust according to your taste.

Buon Appetito!

Sunday, April 5, 2009

Basil Ice Cream, Strawberries, and Balsamic Reduction


Taking this picture was a lesson on patience, setting, styling, and I know I wouldn't get an A, but I have no more ice cream so this picture has to do. I don't have much of a set up yet, so I take pictures with natural light and a white foam board to reflect the light. I initially put the plate on the freezer with the quenelle of ice cream, but as soon as I took the plate out, droplets of condensation started forming, which made the balsamic reduction smear and look horrible. I didn't have more ice cream left (yes it was so good we gobbled it up pretty fast), and the sun was moving closer and closer to the plate! I quickly wiped the plate and took few more pictures before it was too late. This is the only one that made the cut, and only barely I am afraid. Everything looks nice and shiny except for the ice cream blob, the picture doesn't do any justice to the pale green ice cream unfortunately.

I made the ice cream for my husband's birthday and served it with cream biscuits. The dessert got a 10 from a man with a very discerning palate, which means it was pretty good.

The recipe comes from Pastry Chef, cookbook author extraordinaire, David Lebovitz, one of my favorite people in the pastry realm. As told in his books, David started his career in pastry while working on the savory side of the Chez Panisse kitchen. He later became Pastry Chef, and worked there for many years. Eventually David left the Bay Area and moved to Paris where he still resides (did it do it for the French macaroons?). Check out his website because he is not only funny, but extremely knowledgeable on all things pastry. His cookbooks are fun to read and a great source of inspiration. Years ago, I casually bought David first book Room for Dessert not knowing who he was, but I immediately knew it was love when I read that not only he doesn't like chocolate and raspberries together, but he is also crazy for cardamom, one of my favorite spices. When David came out with The Perfect Scoop, I knew that sooner or later I had to buy it, and I am happy I did. The book has plenty of ice cream recipes to choose from in the second chapter (Green Pea Ice Cream anyone?). In the next two chapters, you can find great sorbet and granita recipes like Cantaloupe sorbet, Leche Merengada, or Mojito Granita. He doesn't stop at the frozen part though, but also includes three more chapters: one on sauces, one on crunchies to mix in, and one on vessels you can bake to present your creations with. Are you running to your local bookstore yet?

Basil Ice Cream
adapted from the Perfect Scoop

1 cup packed basil leaves
3/4 cup sugar
2 cup heavy cream
1 cup whole milk
pinch salt
5 large eggs
zest of one lemon

Grind the basil leaves with the sugar and 1 cup of the cream until the leaves are ground as fine as possible. Pour half of the mixture into a large bowl and add the remaining 1 cup of the cream.

Warm the other half of the basil mixture with the milk and salt. While the milk is warming up break up the yolks with a whisk. When the milk start simmering, turn the heat off, and pour it slowly into the yolks whisking to temper them until they thicken into a custard. Strain the yolk custard into the reserved cream-basil mixture, mix well, add the lemon zest and chill completely. Freeze the ice cream base in your ice cream maker according to the manufacturer's instructions.

Buon Appetito!

Tuesday, March 31, 2009

Bread Baking Day-Birdseed Muffins


This month's theme for the Bread Baking Day is Quick Breads and is hosted by Mansi at Fun and Food Blog. I love making all sorts of quick breads, and always look for new recipes, so this challenge was the perfect excuse to try something new. I have been wanting to make these muffins for the longest time, the recipe comes from the lovely book Nancy Silverton's Pastries from La Brea Bakery. If you don't know Nancy Silverton, she is one of the people responsible for bringing back artisan bread in this country when she opened La Brea Bakery in 1989, in Los Angeles. Nancy and her ex-husband Mark Peel also opened Campanile, a restaurant located in the 1929 building where Charlie Chaplin had his office, on La Brea Avenue, in Los Angeles. Nancy is a bread encyclopedia, has written many books, and is a great source of inspiration.


I knew the recipe would be interesting, it has eight grains/seeds, is partially sweetened with honey and has buttermilk as the liquid, which adds a nice tang to the muffins. The recipe is not exactly quick as it requires a toasting and a grinding step, which add about 10 minutes to the execution.

The recipe is not a traditional muffin recipe but rather a cup cake/cake recipe. The butter is first creamed with the sugar, the eggs are then added, the liquid and the flour go in last. After noticing the batter separating after adding the honey, I modified the recipe by adding the flours and the buttermilk in the more traditional 3:2 additions. If you have the book there is a probable mistake in the amount of sunflower seeds, the recipe calls for 1/4 cup plus 2 tablespoons of seeds, but in parenthesis it says 6 ounces which is more than a cup.

I had to add this photo because it reminds of a well known leaning tower. I am not even sure how the muffin on top didn't fall.

The muffins came out perfect and very pretty. They are not very sweet, so if you like your muffins sweet add 1/4 cup of sugar. They were perfect with a dollop of butter on top, YUM!

Birdseed Muffins
adapted from Pastries from La Brea Bakery

1/4 cup plus 2 tablespoons sunflower seed
1/2 cup rolled oats
2 tablespoons wheat germ
1/4 cup millet
1/4 cup sesame seeds
1 tablespoon flax seeds
1 1/2 cups all purpose flour
1/2 cup whole wheat flour
1 1/4 teaspoon baking powder
1/2 teaspoon baking soda
1/4 teaspoon salt
1 tablespoon poppy seeds
4 ounces of butter
1/2 cup sugar
2 large eggs
1/4 cup mild-flavored honey. such as clover
1 1/4 cups buttermilk

For the topping:
2 tablespoons millet
2 tablespoons flax seeds
2 tablespoons poppy seeds
2 tablespoons sesame seeds

Pre-heat the oven to 325F. Spread all the top 6 ingredients in rows on a baking pan, and toast for 6-8 minutes. Allow to cool. Turn the oven up to 350F.

In the bowl of a food processor fitted with the steel blade, combine the sunflower seeds, wheat germ, flours, baking powder, baking soda, and salt. Process until the seeds have the consistency of the flours. Add the rest of the toasted grains and the poppy seeds, pulsing on and off a few times, just to combine.

In the bowl of an electric mixer fitted with the paddle attachment, cream the butter with the sugar until light and fluffy. Add one egg at a time, mixing well between each addition.

Add the honey and mix well. Add the flour mixture and the buttermilk in 3:2 additions, mixing only until incorporated, scraping the bottom of the bowl after each addition.

To prepare the topping: mix the four seeds together. Sprinkle 1/2 teaspoon on the topping into the bottom of each paper lined muffin cup. Fill the cups completely to the rim and sprinkle 1 teaspoon of the topping over the surface of each muffin. Bake for about 25 minutes, until firm and golden. I made 24 mini muffins and 8 regular muffins.

Buon Appetito!

Wednesday, March 25, 2009

A Perfect Match

My father had a rhubarb plant in his garden and I always wondered what for? Maybe rhubarb has entered the Italian cooking realm nowadays, but when I was growing up this vegetable was normally used in the making of liquors, notably Rabarbaro Zucca, which is made with the rhubarb root. My first encounter with rhubarb in the States was a weird concoction that a friend of ours brought to a party. She had approximated the ingredients since she didn't have half of them, so needless to say her creation didn't knock our socks off, it actually put rhubarb into a remote part of my brain. Luckily, I had the great fortune of spending four months as a pastry intern at the restaurant Chez Panisse and got re-acquainted with this fabulous vegetable. I learned many thing working under the watchful and very talented Pastry Chef Mia Ponce, but there is one thing I keep making all the time, their galette dough, known among them as "crunch dough". A fruit tart is always on the menu at Chez Panisse, made with whatever fruit is in season, and it is their best seller I believe. The tart/galette can be made with lots of different fruits, and it is one of the best thing I have ever tasted. I have used various fruits, sometimes in combination, but four are at the top of the list: figs, cherries, plums (especially Santa Rosa), and rhubarb (technically a vegetable).

The dough's recipe came to them via Jacques Pépin, and it has been published in three of their cookbooks, including the Chez Panisse Café Cookbook. I make enough dough so I always have few disks in the freezer to defrost on a whim (you can too by quadrupling the recipe and make 8 portions). Yesterday I made two apple and two strawberry tarts for a friend of mine who ordered them for her baby shower. This dough is a little tricky to master but the results are spectacular, and wait until people start tasting it, you will have many friends all of a sudden. The crusts results in a super flaky delicious treat and the fruit speaks for itself, unencumbered by too much fuss. I just found a great photo collection taken by Anita during a class that the talented Shuna of eggbeater taught, click here to get a better visual lesson on how to make a gallette.


The fruit combinations are infinite, so experiment with different pairing (bing cherries mixed with rainier cherries add color interest for example). The trick with some of the more watery fruit, like berries or cherries, is to toss them in a tablespoon or more of flour before adding them to the crust. Because of the sugar and water contents of each fruit varies you have to go with instinct on both the flour and the sugar, but once you have made few of these tarts you will know. I add sugar on the fruit to taste, figs don't need either sugar or flour because they are very sweet already, apples only need some sugar. Plums need some sugar but I like to make a nice glaze with the pits, some water, and sugar that I brush on the finished tart for shine and extra sweetness. Cherries and berries both need sugar and flour. You can always sprinkle more sugar and/or flour half way the baking if you think the fruit needs it.

The rhubarb is cut in 4-6" chunks which are then cut in half length-wise and then cut into thin strips. I never peel the rhubarb since fibers are not an issue with the rhubarb I am able to find in the Bay Area markets.

And here is the final product in all its glory.


Crunch Dough
adapted from Chez Panisse

2 cups bread flour
3/4 tsp sugar
pinch of salt
6 oz unsalted butter
1/2 cup ice water

Cut the butter in 1 inch cubes and let soften at room temperature to the consistency of marsh mallow.
Add butter to pre-sifted dry ingredients and mix just enough to coat the butter pieces with flour (this can be done in a mixer or by hand).
Press all the butter pieces with your fingers to flatten them like coins.
Drizzle cold water over the dough while mixing until it comes together. It is very important to not over mix. If the dough is too dry sprinkle more water. The last mixing of the dry parts with the wetter parts is better done by hands. Do not over mix the dough, you want to still see some small pieces of butter and the dough should look like pieces of rugs. Divide the dough in two, wrap each half in plastic, flatten into disks, and refrigerate overnight or freeze.

Let the dough defrost completely and roll as thin as you can and then refrigerate or freeze to harden the butter again.

Spread a layer of frangipane on the dough, leaving an inch border. Spread the fruit on top in one layer overlapping the pieces since they will shrink. Fold the edges of the crust over the fruit, making pleats. Lightly brush melted butter on the crust and then sprinkle with some granulated sugar. Bake at 375F until the crust is brown and the fruit is cooked. I make a 4X recipe that yields 8 crusts so I always have some in the freezer. For this tart I sprinkled the rhubarb with some sugar, the zest of one orange and some orange juice. Half way the baking the rhubarb needs to be pushed down into the juices so it won't dry out and burn. You will need about 11 ounces of rhubarb per tart.

Frangipane
(enough for 2 tarts)

4 oz. unsalted butter, at room temperature
1/2 cup granulated sugar
1 large egg
4 oz. ground almonds

Cream the butter with the sugar, add the egg, and mix until is it incorporated well. Add the nut flour until well combined. The unused frangipane freezes very well too.

Thursday, March 19, 2009

Know Your Numbers

I made these adorable tuiles for a cake to celebrate a great guy who is going to school to become a teacher. Part of his course requirements was to work in a third grade class, which is were you learn the multiplication table. Every time I think about the multiplication table, which in Italian we call it the Pythagoras table, I think about one of my oldest friends, Anna B. In elementary school Anna had the misfortune of having a teacher who didn't believe in getting the kids to memorize the multiplication table so she never learned it. By the time we became best friends in middle school, she hated math, mainly because she was handicapped by the numbers she didn't know how to multiply. I felt really bad for her, especially because I loved math and couldn't make her love it too. According to Wikipedia, Pythagoras and his students believed that everything was related to mathematics and that numbers were the ultimate reality and, through mathematics, everything could be predicted and measured in rhythmic patterns or cycles. Not bad for someone who lived around 500 B.C.

The recipe comes from Martha Stewart's Wedding Cakes cookbooks and it works so beautifully. I have not one but two copies of this book, and not because I am a cookbook junkie, but because a great friend send it to me as a gift not knowing that I already had it.


The trick is to have two tuile batters, a plain one and a chocolate one. The desired shape is first stenciled with the plain batter and then a message is written with the chocolate batter. When the tuiles bake, the two batters melt together and they look awesome. Imagine the possibilities!

Tuile Banners
adapted from MS Wedding Cakes

White tuile batter
5 tablespoons of butter, melted
4 egg whites
1 cup sugar
1 cup all-purpose flour
Pinch of salt
3 tablespoon of heavy cream

Beat the egg whites and the sugar on medium until combined, 30 seconds. Add the flour and the salt, and mix well. Add the melted butter and the cream and beat until combined. Refrigerate until chilled, 15 minutes.

Chocolate batter
2 1/2 tablespoons of butter, melted
2 egg whites
1/2 cup sugar
1/4 cup all-purpose flour
1/4 cocoa powder
2 tablespoon of heavy cream

Beat the egg whites and the sugar on medium until combined, 30 seconds. Add the flour and the cocoa powder, mix well. Add the melted butter and the cream and beat until combined. Transfer to a pastry bag fitted with a fine-holed round tip (#1 or #2). Set aside.

Pre-heat the oven at 350F. Line a baking pan with a Silpat. Cut the desired shape out of a plastic lid. Using a small offset spatula spread the chilled bater inside the stencil, on the Silpat. Pipe the desired words with the chocolate batter directly onto the stenciled shapes. Bake at 350F until just set and the edges begin to brown. Remove when still warm and let cool. Store in a airtight containers.

Tuesday, March 17, 2009

For the Love of Green


Not that I celebrate St. Patrick's day, or that I have Irish blood (I have been to Ireland if that counts), but I had some cooked nettles in my fridge so I made a nettle frittata for lunch. I got my greens for the day and loads of minerals, Yum!


Nettle Frittata

1/2 to 3/4 cup cooked nettles*
4 eggs
pinch of salt
EV olive oil

Whisk the eggs then add the nettles and the salt. Mix well then cook in a hot non-stick pan. After few minutes turn the frittata and cook on the other side until golden.
*I cooked a shallot in olive oil and then added the nettles until cooked through, 5-8 minutes.

Tuesday, March 10, 2009

Paper Chef 38-Anchovy Paté on Multigrain Crackers

Paper Chef is a fun monthly challenge where you get to create a dish with randomly selected ingredients and then post the recipe on your blog.

Mike was the winner of last month's Paper Chef so he randomly selected the ingredients of this month's challenge: anchovies, figs, mint, and then threw in polenta for fun. It took me a while to decide how to put these seemingly unrelated ingredients together, and I am not sure the mint really works in this dish, it gets masked by the strong anchovy's taste.

I adapted a whole grain cracker recipe by adding dry figs and stone ground polenta, and topped them with an anchovy paté my mom used to make. I then sprinkled fresh peppermint on the paté, thinking that the peppery taste would stand up to the anchovies. The combination of the crackers and the paté worked well, the mint flavor got lost, maybe infusing the butter with the mint ahead of time would have worked better. The challenge was fun, can't wait to see what the other bloggers concocted.


Whole grain crackers

1 1/2 cup whole wheat flour
1/2 cup stone ground polenta/cornmeal
1 cup dry figs, chopped
1/2 cup almonds
1/2 cup sunflower seeds
1/4 cup pumpkin seeds
1/8 cup flax seeds
1/2 teaspoon baking soda
1/2 teaspoon salt
1 1/4 cup buttermilk
1/4 cup agave nectar

Mix all the dry ingredients together. Mix the buttermilk with the agave nectar and add to the dry ingredients. Pour into two loaf pans and bake at 350F until dry in the center. Let cool and slice thin. Toast in a 325F oven until crispy.


Anchovy Paté

4 oz. butter, softened
2 oz. anchovy fillets, drained

Mix the two ingredients until smooth.

Monday, March 2, 2009

Peperoni Ripieni alla Giada


As much as I find Giada De Laurentis hard to like (could it be the overly juicy sounds of her show, her "just like that" annoying phrase, or her tiny body? hard to choose), I bought one of her books at a discounted price and today I used 5 of her recipes (well with some variations). It was my weekly day of cooking for one of my clients and I ended up choosing all recipes from her book Giada's Kitchen. This recipe turned out pretty easy and really beautiful and to make it a complete meal I paired it with roasted chicken drumsticks. This recipe gave me a chance to work with bell peppers that I normally don't use at home since I can't digest them.


I also made an eggplant timbale, gratin of manicotti stuffed with radicchio and ricotta, shrimp pasta with asparagus, and beef hamburgers with cous-cous and zucchini.

Orzo Stuffed Peppers
adapter from Giada's Kitchen

1 (28-oz.) can chopped tomatoes
2 medium zucchini, grated
1/4 cup chopped parsley
1/2 provolone cheese, grated
1/2 pecorino or parmesan cheese, grated
1/4 cup extra virgin olive oil
3 garlic cloves, minced
1 teaspoon salt
1 teaspoon ground black pepper
4 cups chicken broth
1 1/2 cups orzo pasta
6 bell peppers
basil leaves for garnish

Pre-heat oven to 400F

Sautée the minced garlic in olive oil, add the grated zucchini and cook few minutes until soft, add the tomatoes and cook for 5 minutes. Cook the orzo pasta in the broth for 4 minutes, undercooking it a little. Drain and reserve the broth, and stir the drained orzo into the tomato mixture. Add the salt, pepper, provolone cheese and parsley. Cut peppers in half lengthwise and remove the seeds and the ribs. Spoon the orzo mixture into the peppers and place them in a baking dish. Pour some of the reserved broth halfway into the dish, cover with foil and bake in the oven for 30 minutes. Remove the foil, add the pecorino or parmesan cheese and cook 15 more minutes. Transfer onto a serving dish, sprinkle with basil and serve immediately.

Wednesday, February 25, 2009

The Tasting That Couldn't

Chocolate Pavé with Cardamom Ice Cream and Candied Kumquats
(rec
ipe below)

I started to feel intense aversion for the interviewing process a while ago (or is loathing too big of a word?) when I realized that my strong desire to work at a certain restaurant didn't correlate with their perception of my skills. I recently had yet another interview followed by an invitation to bring a tasting of two desserts, a chocolate and a fruit one. I couldn't decide what to bring so I finally settled on four desserts. The chocolate pavé is one of my favorite chocolate cakes, I discovered it about five years ago when I bought Room for Dessert by David Lebovitz, and to this day I never get tired of it. Because the chocolate flavor is so predominant I highly recommend using a high quality chocolate. I normally make it with Scharffen-Berger, my absolute favorite.
Note that I am having a hard time taking pictures of plated desserts, I haven't found the right spot and the ice cream kept melting before I even had time to take enough pictures. Who said that taking pictures of food is easy. The experimenting continues....

Apple Galette with Frangipane Filling Served with Cinnamon Ice Cream and Caramel Sauce

Ginger Créme Brulée with Ginger Snaps and Raspberries

Plate of Assorted Cookies*

Needless to say I didn't get the job. Apparently everything tasted good but it wasn't exactly what they were looking for. I could elaborate more but what's the point? I want to share recipes, so here they are.

Chocolate Pavé
adapted from "Room for Dessert"

4 oz. bittersweet chocolate (62%)
4 oz. unsweetened chocolate (99%)
1/2 pound (8 oz.) butter
6 eggs, separated, at room temperature
1/2 plus 1/2 cup of sugar

Melt the butter and the chocolate in a double boiler. Separate the eggs. Beat the yolks with half the sugar until foamy, and fold in the melted chocolate and butter. In the meantime, whip the whites with the other half of the sugar until medium peak form (DO NOT over mix the whites otherwise the cake will turn thin and very wet). Fold the whites carefully into the chocolate-egg mixture. Pour onto a well buttered and paper-lined cake pan (at least 9" if not 10" in diameter). Bake at 350 until done (the center should be firm). The cake suffles and it will start shrinking as soon as it starts cooling. To avoid cracking of the margins, push the edges in as soon as it comes out of the oven.

Cardamom Ice Cream
adapted from Blue Ginger

1 cup of milk
2 cups of heavy whipping cream
3/4 sugar
6 cardamom pods, crashed
pinch of salt
5 yolks

Scald the milk and the cream with the sugar and steep with the cardamom for an hour. After an hour re-heat the milk to scalding point and slowly add to the yolk to temper (if the milk and cream are at the boiling point there is no need to custard the yolks, they will cook with the heat of the milk and cream). Strain the custard and chill immediately. Churn into ice cream according to your ice cream maker.

* checkerboard sablées, almond cocoa nib sticks, korova cookies, ginger snaps, and pecan shortbread cookies

Tuesday, February 24, 2009

All Things Venetian


Carnival in modern-day Venice wasn't a big deal until the late 70's, early 80's, it was a private affair, mostly children in costumes, confetti and not much more. Then the city decided to market it to attract people to visit the city in one of the slowest months, February. I remember the first year we got invaded by hoards of people, the streets became unmanageable and I almost got thrown off a bridge (I kid you not). I guess Venice was experiencing a hard time financially and with the resurgence of Carnival the municipality was hoping to bring money in, but didn't prepare for the number of people that came within 2-3 days. The first few years were fun, I was in my early tweens and I remember fondly the enthusiasm we felt with all the fun activities and the music everywhere. Every little campo (square) had some sort of event going on, it was great. The novelty wore off eventually, due in part to the drunks tossing bottles everywhere, the acts of vandalism, and the amazing amount of trash left behind. I was left with a bad aftertaste, and felt that Venice was been violated, that all people cared about was cheap and fast entertainment, and nobody really understood this ancient city. Every year Venetians can't wait for the Carnival to be over so they can get they city back, I wonder whether they feel the same in New Orleans. The history of carnival is so rich, we have many characters that originated from Venice, many depicted in la commedia dell'arte, Carlo Goldoni being our most famous writer. I wish people took time to really learn what Carnival is about, and respect this beautiful place I still call home.

There are many things we eat during Carnival, fritoe or frittelle being my favorite and most loved by all children. I am not sure they were the culprit but when I was around ten years old I remember waking up covered in itchy red spots after having consumed a ridiculous amount of frittelle the day before (an early sign of my lack of control when it comes to good food). There are many recipes for these little fritters, I like the basic recipe better, made with yeast, water and flour. Typically frittelle in Venice are made with raisins, I like to add pine-nuts as well.

Venetian Fritters
Fritelle alla Veneziana


500 grams all purpose flour (1# 1oz)
15 grams dry active yeast (.5 oz)
4 tablespoons sugar
200 grams raisins (7 oz)
100 grams pinenuts (3.5 oz)
pinch of salt
2 cups warm water
zest one orange

Dissolve the yeast in the warm water, add half of the flour and let rest for few minutes. Add the rest of the ingredients and mix until just combined, the dough should be very wet and slightly thicker than a waffle batter. Let rest for 3 hours. Fry by dropping spoonfuls in hot vegetable oil (set at 380), drain, and dust with powder sugar. Eat fresh as they turn stale after few hours.

Buon Appetito!

Monday, February 16, 2009

Nettle Ravioli

I love the taste of fresh pasta. In fact it tastes so good that it only needs some good EVOO (extravergin olive oil), some butter and lots of parmesan cheese. Ever since buying the kitchen aid pasta attachment I have been making pasta often.

Pasta is easy to make and there are plenty of recipes. I make it eyeballing the ingredients, half a/p flour, half semolina, eggs, EVOO, and salt. If it is too dry I add an egg, if too wet I add some flour. Pasta needs to rest before you roll it, to let the gluten relax and to allow the moisture to be distributed.

It all starts with simple ingredients,


then it is resting time,


followed by shaping.


The filling is also simple.


Buon Appetito!


If there are some dough left over you can roll it up and cut it like tagliatelle.


Semolina Pasta

3 ounces semolina flour
3 ounces all purpose flour
1 egg
1 teaspoon extravergin olive oil
pinch salt

Mix all the ingredients and knead until smooth. Let rest at room temperature for half an hour. Either roll as thin as possible by hand or use a pasta machine. I used my kitchen aid pasta attachment and went to setting 6. Keep the pasta ribbons covered to avoid drying.


Nettle Filling

1/2 pound nettles
1 medium shallots
homemade ricotta cheese
1 egg
pinch of salt
zest of one lemon

Sauté the shallots in EVOO, then add the nettles and cook until wilted. Chop cooked nettles then mix the rest of the ingredients until well blended.

Homemade Ricotta

2 quarts whole milk
2 cups buttermilk

Heat the milk and the buttermilk to 170F. Let stand at room temperature for one hour then strain it through cheese cloth. Keep it refrigerated until ready to use.

LinkWithin

Related Posts with Thumbnails