Thursday, April 30, 2009

Frittata di Boraggine-Borage Frittata


When I lived in Venice I used to go with my friends on weekend excursions in the woods of the Venetian countryside. In the spring time we always collected edible plants and then would make the most awesome dishes back home. My friend Paola is an awesome cook and one of the things that connected us was our passion for foraging. There are many plants that are easily foraged in Europe, free and delicious, nettles being one of them.


One of the things that I love to eat is Borage, a very prickly plant with beautiful blue flowers. The leaves can be fried and the tiny flowers can be candied and used to decorate cakes. Borage is a great plant to have in a vegetable garden, apparently it improves the flavor of tomatoes, and it has great health benefits, as an anti-inflammatory, as a stress reliever, and is full of minerals like potassium.

Three years ago I (stole) took a plant from a local garden, that plant grew and its progeny has reseeded itself for the past three years.

I did some work in the garden this morning and felt like eating something I grew, and borage was just calling my name. The easiest way to eat it is in a frittata, for a healthy, quick, and satisfying lunch.


Borage Frittata

1 medium shallot
EVOO
1 cup chopped borage leaves
2 eggs, beaten
salt and pepper

Cook the shallots in the olive oil until translucent, add the borage and cook until soft. Add the cooked leaves to the eggs and mix well. Heat some more olive oil in a non stick pan and pour the egg mixture in. Cook on medium heat until it is cooked halfway. Turn the frittata on the other side and cook through. Serve it warm. I simply rolled a slice with some arugula and ate it as finger food.

Buon Appetito!

Wednesday, April 29, 2009

Tomato Cheese Tart


I love making this galette in the summer when the tomatoes are at their fullest. It is a sure crowd pleaser, it travels easily and is perfect for a picnic. The crust is what makes this galette memorable, it is a very buttery dough, and has the added crunch of cornmeal. I love using stone ground organic cornmeal I buy in bulk, but you can add any corn flour you can find, even polenta would work. I found this recipe in the book Baking with Julia, which I have gone back to many time for inspiration because it is loaded with great recipes from well known chefs and food professionals. The book is based on the PBS series hosted by Julia Child and written by Dorie Greenspan, another wonderful author. Each recipe in the book is written clearly, each step well explained, and all the things I have tried turned out perfect (the sticky buns recipe gets a 10). One of my absolute favorites is the fig and raspberry crostata with a linzer crust, so look for the recipe when the season will come, it is one of the best things I have even eaten.

I often make this tart for clients, because it makes people rave. For bigger catering jobs I make the tart in half sheet pans and cut it in squares, they lose the side crusts, but it still tastes terrific.

The original recipe was contributed to the book by Flo Braker, so it is no wonder the dough is so good, Flo is a master baker whom I have learned a lot from. I modified the recipe slightly by omitting the water and adding more buttermilk, and with the addition of fresh herbs. The crust is easy to put together, easy to roll and very sturdy. I like to brush it with olive oil before baking it to prevent drying.

Tomato Galette
serves eight

For the crust
4 tablespoons buttermilk
1 cup all-purpose flour
1/4 cup stone ground cornmeal
1 teaspoon sugar
1/2 teaspoon salt
3.5 ounces cold unsalted butter, cut in 1/2 inch cubes

For the filling
4 oz Monterey Jack cheese, shredded
2 oz mozzarella cheese, cut in small cubes
1/4 cup fresh basil, cut into strips
4 to 6 ripe tomatoes, roma or cherry (pick tomatoes that are not too juicy), sliced thin


Mix the dry ingredients in the bowl of a mixer fitted with the blade attachment. Add the cold butter and mix until the butter pieces are the size of peas. Add the liquid and mix only until the dough comes together. Pour the content on a floured top and push the dough together with your hands, without overworking it. Wrap the dough in plastic and refrigerate an hour or overnight. Roll the dough into a circle, trying to roll as thin as possible. If the dough gets too warm, put it back in the fridge to chill the butter again. Add the cheeses to the bottom of the crust, leaving a 1.5" edge. Arrange the tomato slices in circles, sprinkle the basil, and drizzle some extra virgin olive oil (EVOO). Fold the edge of the crust over the tomatoes and brush it with some more EVOO. Bake at 375, until the crust is golden and the liquid from the tomatoes and the mozzarella has almost completely evaporated.

Bread Baking Day #19, a fun event created by Zorra, is hosted this month by the wonderful Cinzia of Cindystar. She choose a fun theme,
spring country breads, or anything you would bring to a nice spring country picnic, the ones we have so often in Italy. I am not bringing bread or anything made with yeast, but this is something that everyone would enjoy at a country picnic. I actually made some olive panini with a starter I just developed, and they looked and tasted horrible, so I would be ashamed to bring those to a picnic. I have not been having any luck using a starter to make bread, I am about to give up and go back to dry active yeast.


Buon Appetito!

Monday, April 27, 2009

Daring Bakers-Cheese Cake Revisited


The April 2009 challenge is hosted by Jenny from Jenny Bakes. She has chosen Abbey's Infamous Cheesecake as the challenge.

For this month’s challenge, Jenny picked a cheesecake, courtesy of her friend Abbey. If you would like to see the original recipe please visit Jenny at JennyBakes.com.

I normally use a cheesecake recipe from Spago dessert cookbook which I love, it is light, not too overpowering, and very delicate, but decided to try this recipe and twist it a little. Initially I wanted to try it with goat yogurt, but then realized I had some chevre in the fridge so I used that instead. Buttermilk was also used instead of the cream for an extra punch. I decided to forgo the crust since no matter what you use it ends up soggy, so I used a pistachio streusel as a substitute crust and as a dish garnish.

I love pairing citrus fruit with cheese cakes or anything that has lots of fat, it tames the heaviness, and since I had lots of blood oranges around, they were the pick of choice. I made the citrus tuiles with juice from the blood oranges, and the batter turned out a beautiful pink color that was unfortunately overcame by the sugar browning during baking. They still retained a beautiful color though.

To stay with the orange theme I candied whole slices of blood oranges in simple syrup to use on the plate. Some of the orange flavored syrup was also used for both garnish and flavor on the plate.

I liked the taste of the goat cheese, it wasn't too overpowering and it added zing to the recipe. What I didn't like was the texture of the cheese cake, and I am not sure it was due to the slow cooling in the oven, which might have overcooked it, or to the addition of the chevre and buttermilk. I will have to try my recipe and method with the addition of chevre to compare.

Chevre Cheesecake

16 oz of cream cheese, 2 8-oz packages, at room temperature
8 ounces chevre
1 cup / 210 g sugar
3 large eggs
1 cup / 8 oz buttermilk
1 tbsp. lemon juice
1 tbsp. vanilla extract (or the innards of a vanilla bean)

DIRECTIONS:
1. Preheat oven to 350 degrees F (Gas Mark 4 = 180C = Moderate heat). Begin to boil a large pot of water for the water bath. Spray ten 6-oz ramekins with vegetable spray.

2. Combine cheeses and sugar in the bowl of a stand-mixer (or in a large bowl if using a hand-mixer) and cream together until smooth. Add eggs, one at a time, fully incorporating each before adding the next. Make sure to scrape down the bowl in between each egg. Add buttermilk, vanilla, lemon juice, and blend until smooth and creamy.

3. Pour batter into prepared ramekins. Place ramekins into a larger pan and pour boiling water until halfway up the side of the ramekins.

4. Bake 25-30 minutes, until it is almost done - this can be hard to judge, but you're looking for the cake to hold together, but still have a lot of jiggle to it in the center. You don't want it to be completely firm at this stage. Close the oven door, turn the heat off, and let rest in the cooling oven for one hour. This lets the cake finish cooking and cool down gently enough so that it won't crack on the top. After one hour, remove cheesecake from oven and lift carefully out of water bath. Let it finish cooling on the counter, and then cover and put in the fridge to chill. Once fully chilled, it is ready to serve.

Citrus Lace Tuile

adapted from The Last Course

1 2/3 cup sugar
1 cup all purpose flour
3/4 cup blood orange juice
2 tablespoon lemon juice
7 ounces butter, melted and cooled
3/4 teaspoon grated blood orange zest
3/4 teaspoon grated lemon zest

In the bowl of an electric mixer fitted with the paddle attachment, mix the sugar and the flour. With the mixer on low speed, drizzle the juices and mix until smooth. Drizzle the cooled butter and the zest.. Increase the speed to medium and mix until smooth. Refrigerate for at least two hours.

Pre-heat the oven to 325F. Spoon the desired amount of batter on a baking sheet lined with a silpat and bake for 10 minutes (anywhere from a teaspoon to a tablespoon depending on the final desired size). The batter spreads quite a bit, so don't bake more than 6 tuiles at the time. When the bubbles have subsided, and the tuiles are nicely browned evenly remove from the oven, let cool until you are able to handle the tuiles, lift one at the time and wrap around the handle of a wooden spoon for cigarettes, or around a rolling pin for round tuiles.

Pistachio streusel
adapted from my former mentor, Pastry Chef DMcG.

equal parts in weight of:
pastry flour
granulated sugar
finely ground pistachios
cold butter, cut in small cubes

Mix the dry ingredients in the bowl of an electric mixer fitted with the paddle attachment. Add the cold butter and mix until it just starts coming together. Cool for at least an hour in the refrigerator (the unbaked streusel keeps for few days). When ready to bake, pre-heat the oven to 325F. Spread the desired amount on a baking sheet lined with a silpat and bake for 10 minutes. When the sides start coloring, remove the pan from the oven and break any lumps with a bench scraper, mixing the streusel for even baking. Cook for another 5 minute and repeat the mixing, so no lumps form. When the streusel in nicely colored but still soft looking, remove it from the oven, repeat the breaking of the lumps one more time and cool completely. Keep in an airtight container. This is such an amazing recipe and it can be made with other nuts, and sprinkled on anything. Warning, it is addictive!

Buon Appetito!

Monday, April 20, 2009

Baking-A Consuming Passion


Shuna, the talented creator of eggbeater, wrote a beautiful ode to baking. Please go read it, I will wait. She explained very poetically exactly how I feel about baking. It is a 24/7, sometimes consuming, mostly happy, aspect of my life. I have woken up in the middle of the night with ideas on certain dessert combinations, on what to add to a cake to make it more interesting, or just worried about the next interview, or in anticipation of the first day of a new job.

I am officially unemployed, but not without constant thoughts of what to bake next. I have a starter in the work on the counter, meyer lemons waiting for an inspiration, an ever growing collections of recipes I want to try, recipes I am testing for a cookbook author, a baking class in the planning, dozens posts I want to write, the bowl of the ice cream maker in the freezer for when inspiration strikes, ginger snaps in the fridge ready to be baked, and hundred more things I want to do.

And the cookbooks! Every now and then a new great cookbook comes out, I get my hands on it and it is instant love, I have to have it. Once I get it I tell myself that I won't fall for it again, next time I will be wiser, more mature, less irrational. I have at least 50 baking books, 10 only on chocolate, 5 on cookies, 4 on ice cream, 3 on bread, 3 on candy and confections, and often multiple cookbooks by the same author, I am a junky, no doubt. I often borrow a book from the library and then proceed to photocopy it almost entirely because of all the interesting recipes I can't live without. I have a binder full with my tested recipes, it weighs a ton, they are all nicely stored in plastic pockets so they won't get ruined. And the magazine clippings, I won't even go there....


Without farther ado, I want to share this recipe I have meant to try for ages and finally did. It comes from the book The Cheese Course, and because I somehow misplaced the second page with the instructions on how to make the dough, I have added my own instructions. The bread requires two days to make, so plan ahead. It is one of those recipes that should come with a warning, as you can't possibly eat just a slice.


Grape Focaccia
adapted from the Cheese Course

For the sponge
1 cup warm water
1 teaspoon active dry yeast
1 cup all-purpose flour

One day ahead add the yeast to the warm water, and let stand for 2 minutes, then whisk with a fork to dissolve. Mix in the flour to make a loose dough, refrigerate overnight.

For the focaccia dough
1/2 cup water
1/3 cup dry white wine
1/3 cup EVOO
1 1/2 teaspoons kosher salt
2 tablespoons cornmeal
2 2/3 cups unbleached all-purpose flour
1/2 pound seedless grapes (I used green grapes), halved
1/4 coarse sugar or granulated sugar


To make the focaccia dough: In the bowl of an electric mixer fitted with the hook attachment, add the sponge, the water, the salt, wine, EVOO, and cornmeal. Mix on low speed for few second, and with the mixer running add the flour until a soft dough forms. Mix at speed 1 for 5 minutes. The dough should clear the sides of the bowl but stick to the bottom of the bowl. Add more flour to make the dough clear the sides of the bowl if necessary. It should still be sticky and soft. Transfer the dough onto a floured surface and pat into a rectangle. Let rest for 5 minutes. Stretch the dough from each end to twice its size. Fold it like a letter into a rectangle. Spray with oil, cover with plastic and let it rest for 30 minutes. Stretch the dough two more times with the 30 minute resting time. Line a 17x12 sheet pan with paper and brush with oil. Press the dough onto the pan, brush it with extra extra vergin olive oil and dimple all over with fingers. Rest the dough 5 minutes to relax the gluten then finish spreading it evenly. Add the halved grapes on the top, cover with plastic wrap and let rise until doubled in size, 1 to 2 hours, depending on the room temperature. Before baking, sprinkle the top evenly with the crystal sugar. Bake at 375F until the internal temperature reaches 180-200F. Let rest at least 10 minutes before slicing. Warning: extremely addictive!

This recipe was submitted to Susan at Wild Yeast, to her yeast spotting weekly event. To learn more about this wonderful event click here.
Buon Appetito!

Friday, April 17, 2009

Challah Bread


I see many career paths ahead of me, taking me in different directions, most of them related to food.

One of the things I have been wanting to do for the longest time is to make a handful of superb products to sell in different local venues. One of this venues is about to start so the recipe testing has began today, well last night, Challah bread being the first thing I decided to try.


When this bread came out of the oven I couldn't believe my eyes. I guess I should have trusted the recipe as it comes from a very reputable source, but not having made this bread before I didn't know what the end result would be. This has exceeded my expectations, a keeper for sure. I think it could be slightly sweeter, tweaking the ingredients will do it.

Happy Friday!

Thursday, April 16, 2009

Market Fresh


I love buying produce that is grown locally and organically for obvious reasons. Produce starts losing flavor the moment it is picked, some faster than other. Growing up in Venice, Italy, spoiled me in many ways, but I didn't realize how lucky I had it until I moved to the States, the land of supermarkets. Growing up I was lucky to taste amazingly fresh fruit and vegetables. My mom would go the farmers' market almost everyday, so everything she made tasted fantastic. Freshness is something I have experience for the past four years eating vegetables grown in my little garden. Last June I made a simple pasta with peas picked merely an hour earlier, baby onions, and parsley, also coming from the garden. The flavor of that dish was absolutely amazing. A quick sautée and they were ready. Most Italian dishes like Risi e Bisi, a traditional Venetian dish, have only few ingredients so freshness is a must. This year I planted twice as many pea plants to compensate for the peas I devour before they even reach the kitchen.

Marin County is an amazing place to live in, for million reasons, one being the availability of the best and freshest organic produce, grown within few miles of your home. We have two major weekly farmers' markets in San Rafael, on Thursday and Sunday mornings, and smaller ones located in other cities, some only running in the summer.

Today at the San Rafael Farmers Market there were the usual suspects, Star Route Farms, Marin Roots Farm, Full Belly Farm, to just name a few of these amazingly dedicated farmers. I first headed to get my fix of nettles but at Star Route they were sold out already, bummer! I bought some fava beans, spring onions, artichokes, and Italian kale.


My second stop was at Marin Roots Farm but they didn't have any nettles either, gone to seeds already. Instead I bought some kale flowerlets, which are awaiting inspiration. I am thinking to pair them with onions and lentils.


I also stopped at Della Fattoria stand and bought a wonderful rosemary, meyer lemon loaf, just gorgeous (this amazing bakery deserves a post of its own, coming soon.....).


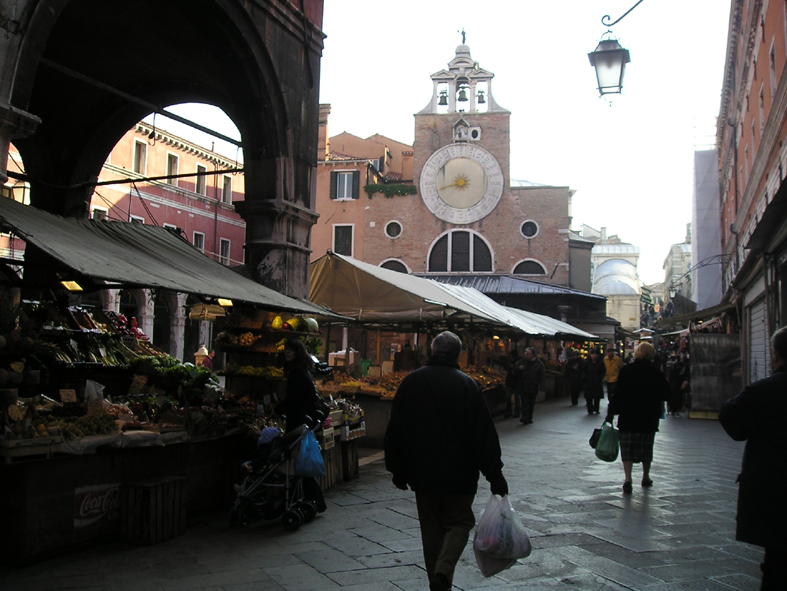
Going to the market brings me an infusion of happiness, a sense of well being. Maybe because it brings back the feeling of walking through Venice's market stalls, buying some early spring offerings, waiting for inspiration to strike.

Happy Spring!

Tuesday, April 14, 2009

Tart with Leeks and Zucchini-Crostata ai Porri e Zucchine

A very cold weather front has hit the Bay Area, the temperature is ridiculously cold, but Spring is here nonetheless. My vegetable garden is in its third year and I am still learning what works and what doesn't. Last fall I planted loads of garlic since it grew really well before, and for the first time I tried leeks which proved to be a good crop too. The garlic bulbs haven't formed the little segments yet, so they need more time in the soil but he leeks are now big enough to justify harvesting them and that is what I did this morning. A tart that could be brought to a summer pic-nic is the perfect ending for these beauties.


Italians don't have the same love affair French have with leeks, so this vegetable doesn't appear too often on the menus. Maybe it is on the account on how we call them, Porri, which doesn't sound too appealing. This tart came to being when I was trying to use some leeks I had bought before knowing what to do with them. I decided to use them in a tart and since my fridge always has zucchini waiting to be used for one thing or another, the zucchini-leek combo was born. I then spiced the filling up with some chili flakes, added cream, eggs, some cheese and voila', a new dish was born. I have to admit the tart sounds/is very French indeed, but Italians will approve I am sure, especially since I used Parmigiano Reggiano.


This is another crowd pleaser I like to bring to parties or make for my catering clients. The tart dough is a typical Pate Brisée, with lots of butter and so delicious. The recipe is adapted from volume I of Mastering the Art of French Cooking by the venerable Julia Child.


Pate Brisée

2 cups of all purpose flour
1 teaspoon salt
1/4teaspoon sugar
6 ounces butter cut in small cubes
1/2 cup ice cold water.

I like to make this dough in a food processor as it is very quick. Add the dry ingredients to the bowl of a food processor, pulse to combine. Add the chilled butter and pulse on and off until the butter is the size of peas. Add the cold water with the machine running, then pulse on and off until the dough start to come together. Small pieces of butter should still be visible. Empty the dough on a floured counter and bring it together, do not over mix it. Wrap in plastic wrap and chill for 2 hours. The dough can be frozen for few weeks. Roll the dough to a 1/8 thickness, line a tart shell and freeze.

Tart Filling

2 medium leeks
2 medium zucchini
EVOO
chili flakes (to your taste)
parsley, finely chopped
1 cup heavy cream
2 large eggs
1/2 cup grated parmesan cheese
salt and pepper to taste

Slice and wash the leeks in cold water (click here to see a detailed post on how to prepare leeks). Heat the EVOO in a large pan, add the leeks and cook until translucent (like you would with onions). Add the zucchini and cook on medium heat until tender, seasoning with salt and pepper. Add the chili flakes and the parsley, and let cool. Mix the heavy cream with the eggs, add the cheese, and season with salt and pepper. Mix the cream mixture with the cooled vegetables and pour onto prepared tart shell. Bake at 375F until the filling is set and the crust is nicely browned. The above amounts will work for a 10", or a 8"x11" tart.

Buon Appetito!

LinkWithin

Related Posts with Thumbnails