Showing posts with label fall. Show all posts

Monday, December 1, 2014

Turkey and Kale Salad


At the risk of committing a heresy, I confess that I don’t like turkey meat.  I find it bland in taste, and always dry, this year's Thanksgiving leftovers were not different.  Despite my finicky taste buds, I wouldn’t want to waste any food, the turkey and the people who raised it deserve better.  This turkey salad used ingredients I had at home and used up the leftovers, it was delicious and very nutritious.  This is just a starting recipe, change the nuts or any of the other ingredients according to your taste.  I threw in some cut grapes towards the end and it was even better, chopped apples would work as well.

Leftover Turkey Salad 

2 cups chopped turkey leftovers
1 cup chopped Tuscan kale
2 stalks of celery, chopped fine
A handful of dried cranberries
A handful of walnuts, chopped
1 big spoon of mayonnaise
1 tsp balsamic vinegar
Salt and Pepper to taste

Toss all the above ingredients and adjust the seasoning. 

Enjoy!


Tuesday, October 4, 2011

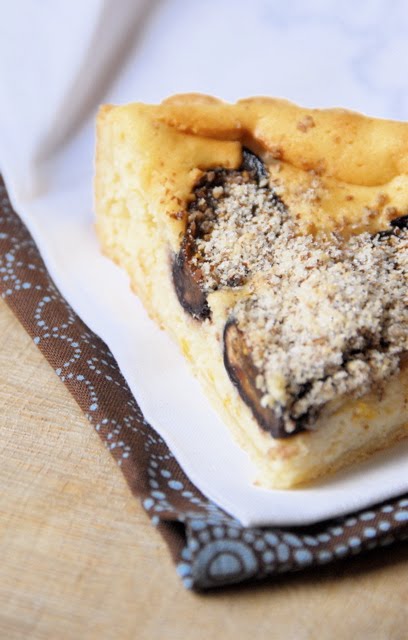
Fig Hazelnut Mini Tarts-Gluten Free


Do you believe in fate?  I believe that sometimes things are meant to be, but I can't explain why.   I recently lost a non baking prospective job, I am not even sure how it happened, likely due to a not so clear e-mail exchange.  Fate wanted that the same day I scheduled an interview with a woman who is opening a bakery in my town, ten minutes walking distance from my house.  Maybe there is a bakery job in store for me, and it would have been impossible to accept it if I had started at the other job.   I also applied to become a Master Gardener and with the prospective job I wouldn't have been able to do it, so maybe it was meant to be.

I think fate wanted me to try this recipe.  I had some figs left from a tart I made on Saturday, and was wondering what to do with them (besides stuffing them in my mouth).  While trying to stuff organize more recipes in my overflowing recipe box, a little recipe card literally jumped out at me.  I originally found it in Martha Stewart magazine, get this...in October 1995, and because it looked so good I kept it but forgot all about it for sixteen years, and four moves later fate wanted me to find it again, when figs are in season.


 Had I found it in January I would have put it back in the box and forgot it again, don't you think?  Are you a believer now?

Since the original recipe contains only two tablespoons of flour I knew it would be a great recipe to adapt and make gluten free.


Below you can find Martha's recipe with few changes I made.  The original recipe calls for brandy and ground pepper but I skipped both.  This is such a versatile recipe, and I plan on using it with other nut and fruit combination, pistachios and cherries come to my mind for example.

I lettori Italiani possono trovare la ricetta tradotta in basso.  La ricetta originale contiene farina,  l'ho trasformata in una ricetta priva di glutine usando 50:50 farina di riso e amido di mais a parita' di dosi.

Fig and Hazelnut Tart
Makes four 4" tartlets of an 8" tart

8 figs, preferably Black mission
1 1/2 cup/200 gr skinned hazelnut, toasted*
1 tablespoon rice flour
1 tablespoon corn starch
1/2 cup confectioners' sugar, plus more for sprinkling
1 large egg plus an egg white
2 tablespoon/1 oz unsalted butter, melted and cooled
2 teaspoons lemon zest
1/2 teaspoon salt
  1. Heat oven to 350F . Cut 6 figs into 3/4-inch dice. Set aside in a bowl.
  2. In a food processor, process nuts until medium fine. Sift together rice flour and 1/2 cup confectioners' sugar; add to nuts; pulse to combine. Add egg, egg white, butter, and zest. Process to combine, about 10 seconds. Add batter to figs, and mix together.
  3. Spray four 3 3/4-inch (or one 8-inch) tart pans with vegetable-oil spray. Divide batter evenly among the pans. Cut remaining 2 figs lengthwise into six slices each. Arrange three slices over each tart. Place tart pans on a baking sheet. Bake until tarts are set and golden brown, about 40 minutes (for individual tarts or one large tart). Remove from oven and cool slightly. Remove tarts from pans, sprinkle with remaining sugar, and serve.
*If you can't find skinned hazelnuts, toast them at 320F for 10 minutes, then using a kitchen towel rub them against each other until the skin comes off.  It won't work for all the nuts, but it is okay because whatever skin is left it will impart flavor too.   Return the nuts to the oven and toast for another 10-15 minutes.

If you are like me and you can't get enough figs, here are more recipes using this amazing fruit:
Fig raspberry crostata with linzer crust
Fig tart from Chez Panisse
Ricotta fig tart
Focaccia with figs


Crostata di fichi e nocciole

8 fichi, preferibilmente neri
200 gr nocciole spellate
10 gr  farina di riso
10 gr amido di mais/maizena
60 gr zucchero a velo
1 uovo piu' 1 albume
30 gr  burro, sciolto e raffreddato
2 cucchiaini di scorza di limone
Mezzo cucchiaino di sale
  1. Riscaldare il forno a 180C. Tagliare 6 fichi a dadini.
  2. Macinare le nocciole con lo zucchero e la farina fino a risultare in una farina fina (aggiungendo la farina si fa si che le nocciole non si trasformino in burro). Incorporare il resto degli ingredienti, mescolare bene, e aggiungere i fichi a dadini, e mescolare bene.
  3. Imburrare bene quattro mini formine da crostata o una da 20 cm. Dividere il composto tra le formine.  Tagliare i due fichi rimasti in 6 fette in lunghezza.  Disporre tre fette per ogni mini crostata.   Trasferire le formine su una pirofila da forno, e cucinarle fino a che le crostate sono dense e dorate, 15-20 minuti.   Lasciare raffreddare, rimuovere le crostate dalle formine e spolverare con ulteriore zucchero a velo.

Friday, September 9, 2011

Frittata with Beet Greens


I wish I could show you pictures of my vegetable beds, but after two months of neglect my garden is all but pretty.  Just before I left I threw few beet seeds in the soil, hoping for some tender beets at my return.  As you can see I was rewarded with these beauties.


There are so many varieties of beets, this is called Detroit Dark Red, the deep red color is amazing, and the flavor mild. As you can see these beets also produced lots of leaves, not to mention they are so pretty in the garden. The package says that 1 cup of greens has more iron than an hamburger, you can't beet that (pun intended!). 


The first time I ate beet greens was about 4 years ago, prepared by a lovely sous chef I used to work with.  She saved them from going into the trash because nobody else thought of using them (the other sous chefs were a lazy bunch, never seen anything like that).  She simply sautéed them and they were delicious, I became a believer.  I love growing beets, I harvest them young so I can eat the whole thing, even the delicious leaves.


The best part of this frittata is that I used all ingredients from the garden, down to the eggs my chickens laid.  Can't get more locavore than this.  I love the pink hue of this frittata, could it be the iron?


Delicious!

Frittata with Beet Greens

Two medium shallots
1 garlic clove
2 tbs extra virgin olive oil
Leaves of 4-5 beets, chopped
3 large eggs
Salt and pepper to taste

Heat a non stick skillet and add 1 tablespoon of olive oil. Sautée the shallots until translucent. Add the garlic and the chopped leaves and cook for 10 minutes, until tender, let cool. Beat the eggs with salt and pepper. Add the cooled leaves. Heat a non stick skillet, add 1 tablespoon of extra virgin olive oil, then add the egg mixture. Cook on medium heat until very little liquid is left. With the help of a plate turn the frittata upside down into the skillet. Cook for two more minutes. Enjoy warm with a salad and some bread for a complete meal. Makes two servings.


Other frittata recipes:

Kale Frittata
Borage Frittata

Saturday, November 27, 2010

Daring Bakers-Apple and Lavender Crostata

I finished on time this month, yeah! Ironically, I made the same crostata for Thanksgiving but forgot to take a picture of it, and probably it was for the better as by the time it came out of the oven there was no day light to take a picture of it. I served it with caramel ice cream, and it was devoured. This tart went in the oven that it was almost dark so the pictures are really bad, plus it is really hard to take pictures of brown food, see the difference with the rose photo, taken at the same time.


The 2010 November Daring Bakers’ challenge was hosted by Simona of briciole. She chose to challenge Daring Bakers’ to make pasta frolla for a crostata. She used her own experience as a source, as well as information from Pellegrino Artusi’s Science in the Kitchen and the Art of Eating Well.

Not sure how to fix the following format, I tried everything, short of rewriting the post, not sure how it happened, apologies.....

When people ask me what my specialty is as a pastry chef I immediately say tarts and cookies, so I was happy to have the excuse to make a crostata for the DB challenge, I will never tire of them. A crostata is essentially a tart, in Italy we mostly make two types, the classic version with pastry cream and fresh fruit, and the one with jam and a lattice top. Because of my love for fresh fruit tarts (crostate), I started making them in college whenever I was going somewhere for dinner, soon I was making them all the time, just so I could eat them. Crostate sealed my fate I believe, as I started trying different versions and never stopped. I believe that what attract me of this dessert is the endless variations. The crust can be flavored by adding lemon zest, vanilla, or ground nuts, and it can be baked blind or with the filling, depending on the recipe. The sky is the limit when it comes to the filling, as you can see from the many versions of other daring bakers. You can find the complete recipe here.

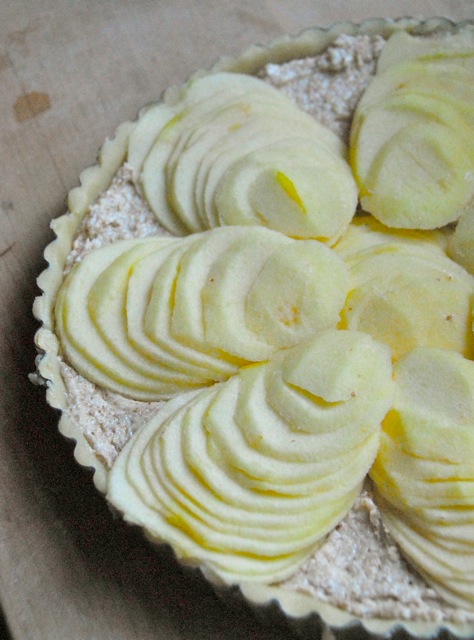
Simona, whom I first met in cyber space and then in real life, gave us two versions of pasta frolla to try, and complete freedom when it came to the filling. Pasta frolla is a type of paté sucree, and it is made by just making a mound of flour, adding the butter in pieces, and binding everything with an egg or few yolks, it comes together in minutes and it is delicious. I struggled for few days to decide what to make, since there are so many fantastic flavors I could have used. This particular tart became my favorite for a while, I first saw it in the 1992 book Savory to Sweet: Pies and Tarts, which is no longer published. I have made this tart dozen of times, it is not only stunning but also delicious. This tart comes from Normandie, a region in France where they grow apples and lavender, thus the pairing of the two in this tasty tart. The recipe for frangipane is mine, the one from the book is a little too rich for my taste. You can omit the lavender if you prefer (I used a tablespoon), but I urge you to try it, it goes really well with the apples.

This bad photo reminds me of pre-digital photos from the 60's, but can't do better than this

Pasta frolla

Ingredients:

  • 1/2 c. minus 1 tablespoon [105 ml, 100 g, 3 ½ oz] superfine sugar (see Note 1) or a scant 3/4 cup [180ml, 90g, 3 oz] of powdered sugar
  • 1 and 3/4 cup [420 ml, 235 g, 8 1/4 oz.] unbleached all-purpose flour
  • a pinch of salt
  • 1 stick [8 tablespoons / 4 oz. / 115 g] cold unsalted butter, cut into small pieces
  • grated zest of half a lemon (you could also use vanilla sugar as an option, see Note 2)
  • 1 large egg and 1 large egg yolk, lightly beaten in a small bowl

Note 1: Superfine sugar is often also referred to as ultrafine, baker’s sugar or caster sugar. It’s available in most supermarkets. If you cannot find “superfine” sugar, you can make your own by putting some regular granulated sugar in a food processor or blender and letting it run until the sugar is finely ground.

Note 2: There are different ways of making vanilla sugar. I keep vanilla beans in a jar half-filled with sugar until I need to use them, for example, to make vanilla ice cream. After I remove the split bean from the custard that will go into the ice cream maker, I rinse it, dry it and put it back in the jar with sugar.

Making pasta frolla by hand:

  1. Whisk together sugar, flour and salt in a bowl.
  2. Rub or cut the butter into the flour until the mixture has the consistency of coarse crumbs. You can do this in the bowl or on your work surface, using your fingertips or an implement of choice.
  3. Make a well in the center of the mounded flour and butter mixture and pour the beaten eggs into it (reserve about a teaspoon of the egg mixture for glazing purposes later on – place in the refrigerator, covered, until ready to use).
  4. Add the lemon zest to your flour/butter/egg mixture.
  5. Use a fork to incorporate the liquid into the solid ingredients, and then use your fingertips.
  6. Knead lightly just until the dough comes together into a ball.
  7. Shape the dough into a flat disk and wrap in plastic wrap. Place the dough in the refrigerator and chill for at least two hours. You can refrigerate the dough overnight.


Making pasta frolla with a food processor:

  1. Put sugar, flour, salt, and lemon zest in the food processor and pulse a few times to mix.
  2. Add butter and pulse a few times, until the mixture has the consistency of coarse meal.
  3. Empty food processor's bowl onto your work surface
  4. See step 3 above and continue as explained in the following steps (minus the lemon zest, which you have already added).

Variation for Version 1 of pasta frolla:

If you want, you can make the pasta frolla using a combination of all-purpose flour and whole-wheat pastry flour.

If you choose to try this variation, use 1 cup [240 ml, 135 g, 4 3/4 oz.] unbleached all-purpose flour and 3/4 cup [180 ml, 100 g, 3.5 oz.] whole-wheat pastry flour.


Frangipane


4 oz. butter, at room temperature
1/2 Cup sugar (100 gr)
1 egg
2 Cups ground almonds (hazelnuts would work as well)

In the bowl of an electric mixer, beat the butter and the sugar until fluffy, add the egg, and beat until well incorporated. Scrape the side of the bowl and add the ground almonds. Spread evenly in the unbaked tart shell. Frangipane keeps few days in the refrigerator and can be frozen for weeks.

Assembly:

Peel, halve, and core 4 apples (I used Golden delicious). Cut each half in very thin slices, keeping the pieces together. Sprinkle one tablespoon of lavender flowers on the unbaked shell, then spread the soft frangipane on top. Add the sliced apples fanning the slices as shown in the pictures. Bake at 350F until the frangipane is set and the apples start to color. Brush the top with diluted and strained apricot preserve to give the tart a beautiful shiny look (warm up few tablespoons of jam with a little water, bring to a boil and then strain any fruit pieces out).

Many thanks to Ivonne of Cream Puffs in Venice and Lisa of La Mia Cucina, founders of Daring Bakers, and to Simona for choosing this month's challenge.

Tuesday, November 9, 2010

Squash Doughnut-A Daring Bakers Challenge


I have been a member of the Daring Bakers since March 2009 and sadly I haven't been able to participate every month. October's deadline caught me by surprise while working part time for a caterer. I was working so hard I didn't even realized it was the 27th until I started seeing doughnut posts going up. I really wanted to try participating in the doughnut challenge, especially since there were so many variations to choose from. Doughtnuts have been having a ranaissance lately, recipes have popped up in many food blogs, and Lara Ferroni, a very talented food photographer, just came out with a doughnut book. Since I missed the deadline, I challenged myself to eventually try all the recipes we were given to choose from, and started with the pumpkin doughnuts, which are not leavened by yeast, but by baking powder and soda instead. The recipe is really straightforward and simple. I used roasted Cabocha squash instead of the canned pumpkin for convenience, since I had it at home, and for flavor as well. The taste and consistency reminded me of little doughnuts called Castagnole, normally prepared in Italy during the Carnival. Needless to say, they went fast!


The October 2010 Daring Bakers challenge was hosted by Lori of Butter Me Up. Lori chose to challenge DBers to make doughnuts. She used several sources for her recipes including Alton Brown, Nancy Silverton, Kate Neumann and Epicurious.

I added the post lines just for the sake of being correct, and presented the recipe as written by Lori. I hope you will try it as it is worth it.


Pumpkin Doughnuts

Preparation time:
Hands on prep time - 15 minutes
Chilling time - 3 hours
Cooking time - 10 minutes

Yield: About 24 doughnuts & 24 doughnut holes

Ingredients
All Purpose Flour 3.5 cup / 840 ml / 490 gm / 17 ¼ oz
Baking Powder 4 teaspoon / 20 ml / 24 gm / .85 oz
Table Salt 1 teaspoon / 5 ml / 6 gm / .2 oz
Cinnamon, ground 1 teaspoon / 5 ml / 6 gm / .2 oz
Ginger, ground ½ teaspoon / 2.5 ml / 3 gm / .1 oz
Baking Soda ½ teaspoon / 2.5 ml / 3 gm / .1 oz
Nutmeg, ground ¼ teaspoon / 1.25 ml / 1.5 gm / .05 oz
Cloves, ground 1/8 teaspoon / .6 ml / ¾ gm / .025 oz
White Granulated Sugar 1 cup / 240 ml / 225 gm / 8 oz
Butter, Unsalted 3 Tablespoon / 45 ml / 42 gm / 1.5 oz
Egg, Large 1
Egg Yolk, Large 2
Pure Vanilla Extract 1 teaspoon / 5 ml
Buttermilk 1/2 cup + 1 Tablespoon / 135 ml /
Pumpkin 1 cup / 240 ml / 285 gm / 10 oz (Canned pure pumpkin or fresh cooked and pureed pumpkin – DON’T use pumpkin pie mix!) I used squash instead
Canola Oil DEPENDS on size of vessel you are frying in – you want THREE (3) inches of oil (can substitute any flavorless oil used for frying)

Powdered Sugar Glaze:

Powdered (Icing) Sugar 2 cup / 480 ml / 250 gm / 9 oz
Whipping Cream (About 32% butter fat) 4 Tablespoon + more if needed / 60 ml

Directions:

  1. Whisk together the first 8 ingredients in medium bowl to blend. Using electric mixer, beat sugar and butter in large bowl until blended (the mixture will be grainy and not smooth). Beat in egg, then yolks and vanilla. Gradually beat in buttermilk; beat in pumpkin. Using rubber spatula, fold in dry ingredients in 4 additions, blending gently after each addition. Cover with plastic; chill 3 hours.
  2. Sprinkle 2 rimmed baking sheets lightly with flour. Press out 1/3 of dough on floured surface to 1/2- to 2/3-inch (12 mm to 15 mm) thickness. Using 2 1/2-inch (65 mm) -diameter round cutter, cut out dough rounds. Arrange on sheets. Repeat with remaining dough in 2 more batches. Gather dough scraps. Press out dough and cut out more dough rounds until all dough is used.
  3. Using 1-inch (25 mm) diameter round cutter, cut out center of each dough round to make doughnuts and doughnut holes.
  4. Line 2 baking sheets with several layers of paper towels. Pour oil into large deep skillet to depth of 1 1/2 inches (40 mm). Attach deep-fry thermometer and heat oil to 365°F to 370°F (185°C to 188°C). Fry doughnut holes in 2 batches until golden brown, turning occasionally, about 2 minutes. Using slotted spoon, transfer to paper towels to drain. Fry doughnuts, 3 or 4 at a time, until golden brown, adjusting heat to maintain temperature, about 1 minute per side. Using slotted spoon, transfer doughnuts to paper towels to drain. Cool completely.
Sugar Glaze
  1. Whisk powdered sugar and 4 tablespoons whipping cream to blend. Whisk in additional cream, 1 teaspoon at a time, to form medium thick glaze.
  2. Can be made up to 3 hours ahead.
  3. Add doughnut holes to bowl of spiced sugar and toss to coat.
  4. Spread doughnuts on 1 side with powdered sugar glaze.
  5. Arrange doughnuts, glazed side up, on racks. Let stand until glaze sets, at least 30 minutes.

Saturday, November 6, 2010

Caramel Ice Cream


I am not in a fall funk anymore, I have embraced the fall fruits to the fullest, and am getting excited by the endless possibilities. Last night I needed an ice cream to go with an apple tart Tatin I made for some friends who came over for dinner. At the risk of almost repeating myself, I decided to try another caramel ice cream, because caramel and apples were made for each other, don't you agree? This time I used a recipe I found in Emily Luchetti's A Passion for Ice Cream, and I want to share it as it is one of the best ice creams I have made (and it was a pleasure to hear how much my guests loved it too, especially Rahel). I have spoken about this super talented pastry chef before, her books are amazing and a constant font of inspiration and awesome recipes. This ice cream recipe is no different, just perfect. I only added some fresh ginger since the ice cream was the closing note on an Asian inspired dinner.

There are two ways to caramelize sugar, a "wet" method that uses water, and a "dry" method where the sugar is melted directly. I have had plenty of wet caramel batches crystallize before my eyes, so I now exclusively use the dry method for small batches of caramel. The recipe calls for the wet method. Whatever method you use, watch the pot and when the sugar starts turning color, lower to flame. The caramel has to be a medium/dark color to have plenty of flavor, but not too dark that tastes burnt.


Most ice cream recipes containing eggs call for heating the egg/cream mixture over the stove to custard consistency. This step is unnecessary if the cream mixture is bubbly hot when tempering the yolks, the temperature is high enough to custard the yolks. By doing it this way, you won't run the risk of overcooking the yolks.


Caramel Ice Cream
adapted from Emily Luchetti

7 large egg yolks
1 cup sugar
1/2 cup water
2 1/2 cup heavy whipping cream
2 oz of fresh ginger, thinly sliced

1/2 tsp kosher salt
2 cups milk

In a heavy sauce pan, stir together the sugar and water and cook over medium heat, stirring occasionally, until the sugar has dissolved. Increase the heat to high and cook, without stirring, until the sugar is medium amber in color. Remove from the heat. Slowly pour 1/4 cup of cream until combined. Be careful as the cream will bubble up and splatter. Add the remaining cream, 1/4 cup at the time, whisking after each addition. Add the ginger pieces and cook on low until all the caramel has dissolved. Turn the heat off and let the ginger steep for an hour. Reheat the caramel to almost boiling, pour it into the yolks to slowly temper and custard them. The caramel base should be thick enough to coat the back of a spoon. To immediately cool the custard, add the cold milk and the salt. Strain the ice cream base and chill completely. Freeze according to your ice cream machine.

Sunday, October 17, 2010

Roasted Pears & Pear-Caramel Ice Cream


Autumn has officially arrived in the Bay Area so it is time to switch the dessert repertoire, and since I believe that ice cream should be eaten year round I decided to try this full-of-promises ice cream from The Perfect Scoop. David Lebovitz doesn't fail to deliver another amazing recipe, and if you don't have any of his books, run to the bookstore. David suggests using very flavorful pears to stand up to the slightly bitter caramel flavor, and recommends using Comice or Barlett. I decided to try asian pears instead, very delicate in flavor, and very perfumed. According to this site the variety I used is called JunoSan, with a reddish brown skin. I added fresh sliced ginger to the caramel to add an extra kick, and that worked really well. The ice cream was paired with pears baked with an almond streusel (I used the Taylor Gold variety, which were a little delicate but really good and juicy). The dessert was light, easy, and really tasty.

Pear-Caramel Ice Cream
adapted from The Perfect Scoop

3 medium-sized pears, peeled and cored
3/4 cups plus 2 TBS (180 gr) sugar
2 oz (60 gr) fresh ginger root, peeled and sliced thin
2 cups (500 ml) heavy whipping cream
1/8 tsp kosher salt

Spread the sugar in a heavy-bottomed saucepan. As the sugar starts to liquefy, shake the pan to let the liquid sugar heat and melt the remaining sugar crystals. When all the sugar is melted and a deep amber color, add the pear and the ginger pieces (remember to count the pieces of ginger as you want to remove them all before pureeing the ice cream base). Don't worry if some of the sugar solidifies. Cook the pears for ten minutes until softened through, stirring so all the caramel will melt again. Remove from the heat, add the cream and the salt, and let cool. Remove the ginger pieces, then puree the mixture in a food processor. Strain the mixture to remove any tough pear pieces if you wish (I didn't and I liked the extra texture). Chill completely, then freeze according to your ice cream maker.


Baker Pears with Almond Streusel

Peel and core the pears, add three tablespoons of streusel to each half. Bake at 375F until soft and the top is nicely browned. Use either one or two half pears per serving, depending on the size.

Tuesday, November 17, 2009

Ricotta Fig Tart


More figs you say? But if you have followed me for a while, you would know that I am a big fan of this versatile fruit (see here, here, here, and here). I could eat figs every day, and now that the season of fresh figs is over I can still get my daily fix with dry figs if I need to. A neighbor has a fig tree she doesn't pick (what's wrong with her?), and I mean to contact her to see if I can do pick it for her and share the bounty, I think there are still a few on the branches. Figs and I go way back, and one of the favorite things to eat as a child where these huge, soft, drenched in corn start, figs my dad used to bring home. I owe my dad a lot of things, my love for eating is one of them.


I haven't made this tart in ages, not sure why since it is one of my favorites. I was trying to think of something new to try with ricotta, my favorite cheese to bake with, to increase my chances of winning the cheese guide and cookbook Sweet Charity is giving away. After a little search in my ever growing stack of cookbooks, I realized that many ricotta recipes were either for Easter cakes, or where kind of boring. I also remembered I still had some extra pasta frolla in the fridge so I opted to make this tart, which you have to give it a try, it is delicious! I suppose that if you are not a fan of figs (how is that even possible?), you could substitute other dried fruit, like plums, or cherries for the figs.


This recipe comes originally from my first ever cookbook I bought in the States, Spago Desserts, which I purchased shortly after moving from Venice to Santa Monica, and is one that has given me few wonderful recipes. I haven't changed the filling of this tart since I think it is perfect the way it is, but I don't use a brioche dough as the base like the book calls for. The brioche didn't work so well the first time I tried it (probably due to my inexperience with yeast doughs), and I think the tart is better and more elegant with a buttery pate sucree. This recipe introduced me to one of my favorite spices, cardamom, a spice I had never used or seen in Italy. After smelling it and tasting it in this wonderful tart I have become a total cardamom addict, I use it a lot, and one of my favorite ways to enjoy it is as an ice cream flavor, in Cardamom Ice Cream.


Make ahead notes:

*When making this tart, plan ahead, since the figs need to be reconstituted in liquor, and the tart is best served chilled. Don't skip the orange zest as it is a match made in heaven with the cardamom and it add a great dimension to the tart.

*If you can't stand the blandness of store bought ricotta, try making it at home with this recipe, it is easy and really superior to the store variety. I would also use whole milk ricotta, not the low fat or fat free versions, the end result will not be the same.

Ricotta Fig Tart
adapted from Spago Desserts

shell:
pasta frolla or pate sucree

filling:
3/4 pound dark dry figs (I use black mission)
3/4 rum or armagnac
3/4 pound whole milk ricotta
3 oz. cream cheese at room temperature
3/4 cup granulated sugar
2 whole eggs
1 egg yolk
3 table spoons lemon juice
1 tablespoon orange zest
1 tsp vanilla extract
1/2 tsp ground cardamom
pinch of salt

topping:
2 TBS almond meal
1 TBS sugar

Roll the dough to a 1/4" thickness, and transfer it into a 10" tart shell. Cut the dry figs in half, and marinate them in rum or Armagnac, until needed. In a large bowl mix the cheeses until smooth, add the sugar and mix until smooth. Add the whole eggs and the yolk, one at a time. Add the lemon juice, orange zest, extract, cardamom and the salt. Mix just until combined. Poured the filling into the tart shell. Drain the figs and arrange onto the filling, without letting them sink. Bake in a 350F pre-heated oven for 10-15 minutes, then add the almond meal mixed with the sugar. Keep baking until the filling is firm to the touch and lightly golden, another 20 minutes or so. Cool on a wire rack and then chill until ready to serve.

Saturday, November 7, 2009

La crostata di mele e mandorle e' di Adriano Continisio


I apologize to my English readers but I have no choice but to join this protest against plagiarism. A well known Italian TV personality "stole" the following tart recipe from Adriano's blog, Profumo di Lievito, and passed it for hers during a TV appearance. Apparently the same woman did the exact thing back in 2003 to Lydia of Tzatziki a colazione. Many Italian food bloggers are publishing Adriano's original recipe today, giving him the credit, and the amazing thing is that nobody is writing the plagiarist's name as everyone knows who she is (except me since I live in the USA and I am clearly not following Italian TV). Don't you love the Internet? Power to the masses! This recipes looked amazing, and I had heard about it from other bloggers so I was happy to try it with or without the protest. The title means "The Apple and Almond Tart is by Adriano Continisio". Adriano wrote about the experience here, and Lydia here.


Pasta Frolla is an Italian version of tart dough, made by mixing the butter with the flour until sandy and then adding the liquids. I had been meaning to try Adriano's recipe anyway since many blogs complimented on it, so here you go, try it too.

The original recipe appeared here, and I am going to reproduce it to the letter, and you can find a translated version at the bottom of the post.

Oggi partecipo a questa protesta, organizzata da Rosy of Rosemarie & Thyme, copiando la ricetta di Adriano pari passo, e il testo seguente da Rosy.

Perchè oggi 8 novembre 2009 molti food bloggers e forumisti pubblicano in contemporanea questa ricetta?

Per solidarietà con Adriano Continisio che l'ha inventata e pubblicata sul suo blog già nel 2007.

Riassumendolo in pochissime parole, questa manifestazione vuole porre l'attenzione prima di tutto sulla necessità di un comportamento corretto per chi usa la rete nei confronti di chi pubblica materiale. Spesso si sceglie di mettere a disposizione il proprio materiale o lavoro con una licenza che permette di usarlo a condizione che se ne citi la fonte e questo è già un dono, a mio avviso. Si dice a chi legge: puoi gratuitamente utilizzare il materiale, puoi prenderlo, ma devi specificare che è mio e dire dove l'hai preso. Non è chiedere molto!

Altra importante condizione è che il materiale non venga usato a scopo di lucro.
Quando tutte e due le condizioni non vengono rispettate è evidente che la cosa è ancor più grave.

Questa volta è capitato ad Adriano, ma nel tempo è già capitato ad altri. Creare un tam tam è forse il primo di tanti passi per avversare il fenomeno, perciò ci siamo uniti e oggi pubblichiamo con il nome del suo autore la ricetta e la foto della crostata che ognuno di noi ha preparato.

E' ora che tutti sappiano di chi è la farina e pure il sacco!!!!! Crostata di Mele e Mandorle ricetta di Adriano, di Profumo di Lievito Ingredienti 400 gr pasta frolla*
4 mele grandi (ca. 600gr al netto degli scarti) 80 gr di zucchero 4 cucchiai di amaretto di saronno succo di mezzo limone poca cannella in polvere massa di mandorle 120 gr uova intere 60 gr zucchero 50 gr farina di mandorle 15 gr farina di mais fioretto 15 gr di fecola un pizzico di sale estratto di mandorle una manciata di mandorle a lamelle sciroppo di zucchero, marmellata di albicocche.
Saltare a fiamma alta le mele sbucciate e tagliate a cubetti, miscelate con il succo di limone e lo zucchero, fino a che non risultino asciutte ma non spappolate. Incorporare il liquore e la cannella e lasciare raffreddare.
Foderare uno stampo da 26cm e cuocere in bianco per 15 minuti (i primi 10 con carta da forno e riso). Nel frattempo montare le uova con lo zucchero ed il sale, incorporare delicatamente le polveri e poche gocce di estratto. Pennellare la frolla con poca marmellata, versare le mele, coprire con la massa e cospargere con le mandorle a filetti. In forno a 170° per ca. 20 minuti. All'uscita dal forno lucidare con sciroppo a 30°be.

Per chi non conosce l'antefatto la storia è su Profumo di Lievito, il blog di Adriano


Dal post di Adriano i seguenti chiarimenti sul dolce:

Quanto conservare la crostata
Adriano: la marmellata fa da parziale barriera, ma la frolla tende ed assorbire l'umido delle mele. Una giornata regge. La farcia è morbida e la copertura inizialmente croccante, poi si ammorbidisce.

Come ottenere lo sciroppo a 30° be per lucidare la torta
Adriano: per lo sciroppo: versare 100 gr di acqua in un pentolino, aggiungere 135 gr di zucchero semolato, portare ad ebollizione, poi lascia reffreddare.

Le uova come sono pesate?
Adriano: le uova vanno pesate senza guscio.

*Per la pasta frolla
la mia ricetta è questa, dividete per 4 o 5
1000 gr farina 0 biscotto (in alternativa 900 gr 00 e 100 gr fecola di patate)
500 gr burro appena morbido
250 gr zucchero a velo (200 se utilizziamo il miele)
200 gr uova intere (oppure 150 gr uova e 50 gr di miele d’acacia se vogliamo una frolla morbida)
6 gr di sale sciolto in 20 gr di succo di limone
6 gr di lievito istantaneo (se utilizziamo farina normale)
zeste grattugiate di un limone
1 cucchiaino di essenza di vaniglia.


Per ulteriori spiegazioni cliccare su La pasta frolla perfetta di Adriano.

For English readers

Apple and Almond Tart

400 gr of Pasta Frolla*

4 big apples (600 gr after cleaning them), cut in cubes
80 gr sugar
4 TBS Amaretto di Saronno liquor
juice of 1/2 lemon
cinnamon

Cook the apples with the sugar and the lemon juice until dry but not too soft. Add the liquor and the cinnamon. Let cool.

Almond Paste
120 gr eggs
60 gr sugar
50 gr almond meal
15 corn flour
15 corn starch
Pinch of salt
almond extract

1/2 cup of sliced almonds
apricot jam

Pre-heat the oven at 350F. Line a 9"-10" tart mold with the pasta frolla. Blind bake the tart crust with pie weights for 15 minutes, removing the weight for the last 5 minutes. While the tart is baking, beat the whole eggs with the sugar and the salt, gently incorporate the dry ingredients and few drops of almond extract. Brush some apricot jam on the crust, add the cooked apples, cover with the almond paste, spread the sliced almonds on top and bake in a pre-heated oven at 350F for about 20 minutes. Brush the top with some sugar syrup (100 gr water and 135 gr sugar, brought to a boil and cooled).

*Pasta Frolla

1000 gr pastry flour
500 gr butter, softened
250 gr powder sugar
200 gr eggs (about 3 large eggs)
6 gr salt
20 gr lemon juice
6 gr baking powder (if using a/p flour)
zest of 1 lemon
1 tsp vanilla extract

Slightly beat the eggs until the salt is dissolved. Mix the flour and the butter in the bowl of a mixer fitted with a paddle attachment until sandy. Add the sifter powder sugar and mix fore few seconds. Add the eggs to the flour/butter mixture and mix until the dough comes together. Wrap tightly and chill in the refrigerator until ready to use. Divide it in portions, wrap tightly and freeze it.

Laura's notes:

*I used more like 200 gr of pasta frolla for my 9" tart, maybe I rolled it too thin. The pasta frolla was nice and soft, easy to roll and not sticky at all.

*This recipe lends to many variations, so it is surprising that the above mentioned TV personality didn't try to change it and make it her own. I can picture the apples cooked with brown sugar and star anise, and other liquors added to the almond paste. The crust can also be modified with the addition of nuts for example.

*The tart took much longer to cook, it was really pale for a long time. I also over beat the eggs so the filling is more spongy than creamy.

* The apple filling was too sweet in my opinion, next time I will use less sugar.

* The cake was really good, the crust nice and soft, the flavors went well together, definitely a keeper.

Tuesday, September 8, 2009

Fig Tart-Pure Buttery Bliss

First came the fig, then the tart, followed by pure buttery bliss. Fork is optional, eating with your fingers is allowed.


I am truly enjoying the fruits of late summer, like tomatoes, pears, and figs. This tart is one of the best things I have eaten in my life, complete sensory satisfaction. For the recipe and the procedure follow the method for the rhubarb tart, just add quartered figs, no extra sugar is needed.

Monday, April 20, 2009

Baking-A Consuming Passion


Shuna, the talented creator of eggbeater, wrote a beautiful ode to baking. Please go read it, I will wait. She explained very poetically exactly how I feel about baking. It is a 24/7, sometimes consuming, mostly happy, aspect of my life. I have woken up in the middle of the night with ideas on certain dessert combinations, on what to add to a cake to make it more interesting, or just worried about the next interview, or in anticipation of the first day of a new job.

I am officially unemployed, but not without constant thoughts of what to bake next. I have a starter in the work on the counter, meyer lemons waiting for an inspiration, an ever growing collections of recipes I want to try, recipes I am testing for a cookbook author, a baking class in the planning, dozens posts I want to write, the bowl of the ice cream maker in the freezer for when inspiration strikes, ginger snaps in the fridge ready to be baked, and hundred more things I want to do.

And the cookbooks! Every now and then a new great cookbook comes out, I get my hands on it and it is instant love, I have to have it. Once I get it I tell myself that I won't fall for it again, next time I will be wiser, more mature, less irrational. I have at least 50 baking books, 10 only on chocolate, 5 on cookies, 4 on ice cream, 3 on bread, 3 on candy and confections, and often multiple cookbooks by the same author, I am a junky, no doubt. I often borrow a book from the library and then proceed to photocopy it almost entirely because of all the interesting recipes I can't live without. I have a binder full with my tested recipes, it weighs a ton, they are all nicely stored in plastic pockets so they won't get ruined. And the magazine clippings, I won't even go there....


Without farther ado, I want to share this recipe I have meant to try for ages and finally did. It comes from the book The Cheese Course, and because I somehow misplaced the second page with the instructions on how to make the dough, I have added my own instructions. The bread requires two days to make, so plan ahead. It is one of those recipes that should come with a warning, as you can't possibly eat just a slice.


Grape Focaccia
adapted from the Cheese Course

For the sponge
1 cup warm water
1 teaspoon active dry yeast
1 cup all-purpose flour

One day ahead add the yeast to the warm water, and let stand for 2 minutes, then whisk with a fork to dissolve. Mix in the flour to make a loose dough, refrigerate overnight.

For the focaccia dough
1/2 cup water
1/3 cup dry white wine
1/3 cup EVOO
1 1/2 teaspoons kosher salt
2 tablespoons cornmeal
2 2/3 cups unbleached all-purpose flour
1/2 pound seedless grapes (I used green grapes), halved
1/4 coarse sugar or granulated sugar


To make the focaccia dough: In the bowl of an electric mixer fitted with the hook attachment, add the sponge, the water, the salt, wine, EVOO, and cornmeal. Mix on low speed for few second, and with the mixer running add the flour until a soft dough forms. Mix at speed 1 for 5 minutes. The dough should clear the sides of the bowl but stick to the bottom of the bowl. Add more flour to make the dough clear the sides of the bowl if necessary. It should still be sticky and soft. Transfer the dough onto a floured surface and pat into a rectangle. Let rest for 5 minutes. Stretch the dough from each end to twice its size. Fold it like a letter into a rectangle. Spray with oil, cover with plastic and let it rest for 30 minutes. Stretch the dough two more times with the 30 minute resting time. Line a 17x12 sheet pan with paper and brush with oil. Press the dough onto the pan, brush it with extra extra vergin olive oil and dimple all over with fingers. Rest the dough 5 minutes to relax the gluten then finish spreading it evenly. Add the halved grapes on the top, cover with plastic wrap and let rise until doubled in size, 1 to 2 hours, depending on the room temperature. Before baking, sprinkle the top evenly with the crystal sugar. Bake at 375F until the internal temperature reaches 180-200F. Let rest at least 10 minutes before slicing. Warning: extremely addictive!

This recipe was submitted to Susan at Wild Yeast, to her yeast spotting weekly event. To learn more about this wonderful event click here.
Buon Appetito!

LinkWithin

Related Posts with Thumbnails