Friday, December 24, 2010

Daring Bakers-Christmas Stollen


I love Stollen! This delicious German sweet belongs to a family of European breads made with eggs, butter, and lots of dried fruit. Panettone and Gubana are other examples, and they probably all generated in the middle ages, when spices, nuts, and dried fruit were used to add nutrition to winter breads. I have made this bread few times when I was in Venice last year, using Whild Yeast Susan's recipe. They were very well received and went quickly. Stollen is normally eaten at Christmas and it represents the blanket the baby Jesus was wrapped in. We were challenged to shape the dough as a wreath, which works really well too.

The 2010 December Daring Bakers’ challenge was hosted by Penny of Sweet Sadie’s Baking. She chose to challenge Daring Bakers’ to make Stollen. She adapted a friend’s family recipe and combined it with information from friends, techniques from Peter Reinhart’s book.........and Martha Stewart’s demonstration.


Sadly I had to give up gluten, so I made this bread but didn't eat it, it was torture let me tell you. I brought it up to the West Point Inn, an amazing place up on Mount Tamalpais, reachable only by foot, where we spent last night. I knew that our friends and their children would love having it for dessert or even for breakfast. We ate it at night and as french toast this morning, delicious! And to make you want to visit San Francisco, here are two pictures of this morning's sunrise, from the Inn, totally priceless!


Amazing views of San Francisco at sunrise


Penny challenged to package the stollen for gift giving so I cooked few mini stollens in these super cute paper molds and gave them as gift to few of my neighbors.

You can find the complete recipe and instructions at the daring kitchen site, but below is just the recipe, edited to make the ingredient list easier to read.

I candied my own peel using the method I normally use, and used grapefruit and lemon peel since that is what I had at home.

I made few changes to the recipe, first in the mixing. I omitted 3 ounces of flour to the dough as the original 27 ounces seemed too much, I prefer a wetter dough in general, plus you can always add more flour if it is not enough. The amount I used, 24 ounces, worked well. Then I didn't add the butter until after the gluten started developing. Fat inhibits gluten development, by adding the butter slowly after the dough has been mixed a while you create a softer, more elastic dough. I used cranberries instead of the raisins to make the bread even more festive (the Germans don't use cranberries as they are a Northern American fruit), and didn't use the cherries the recipe suggests. Last change was in the spice, I used ground cardamom instead of the cinnamon, because it goes so well with the citrus flavor.

Stollen Wreath

Makes one large wreath or two traditional shaped Stollen loaves.
Serves 10-12 people

Ingredients

1/4 cup (60ml) lukewarm water (110º F / 43º C)
2 packages/4.5 teaspoons/14 gr/.5 oz active dry yeast
1 cup milk
5 oz/10 tablespoons/140 gr unsalted butter
5.5 cups/27 oz/770 gr all-purpose flour
½ cup/115 gr sugar
3/4 teaspoon/4.5 gr salt
1 teaspoon/6 gr cinnamon
3 large eggs, lightly beaten
Grated zest of 1 lemon and 1 orange
2 teaspoons/10 ml vanilla extract
1 teaspoon/5 ml lemon extract or orange extract
3/4 cup/4 3⁄4 oz/135 gr mixed peel
1 cup/6 oz/170 gr firmly packed raisins
3 tablespoons/45ml rum
12 red glacé cherries (roughly chopped) for the color and the taste. (optional) I didn't use them
1 cup/3.5 oz/100 gr flaked almonds
Melted unsalted butter for coating the wreath
Confectioners (powdered) sugar for dusting wreath

Directions

Soak the raisins
In a small bowl, soak the raisins in the rum (or in the orange juice from the zested orange) and set aside. See Note under raisins.

To make the dough

Pour 1⁄4 cup (60 ml) warm water into a small bowl, sprinkle with yeast and let stand 5 minutes. Stir to dissolve yeast completely.

In a small saucepan, combine 1 cup (240 ml) milk and 10 tablespoons (150 ml) butter over medium - low heat until butter is melted. Let stand until lukewarm, about 5 minutes.

Lightly beat eggs in a small bowl and add lemon and vanilla extracts.

In a large mixing bowl (4 qt) (4 liters) (or in the bowl of an electric mixer with paddle attachment), stir together the flour, sugar, salt, cinnamon, orange and lemon zests.

Then stir in (or mix on low speed with the paddle attachment) the yeast/water mixture, eggs and the lukewarm milk/butter mixture. This should take about 2 minutes. It should be a soft, but not sticky ball. When the dough comes together, cover the bowl with either plastic or a tea cloth and let rest for 10 minutes.

Add in the mixed peel, soaked fruit and almonds and mix with your hands or on low speed to incorporate. Here is where you can add the cherries if you would like. Be delicate with the cherries or all your dough will turn red!

Sprinkle flour on the counter, transfer the dough to the counter, and begin kneading (or mixing with the dough hook) to distribute the fruit evenly, adding additional flour if needed. The dough should be soft and satiny, tacky but not sticky. Knead for approximately 8 minutes (6 minutes by machine). The full six minutes of kneading is needed to distribute the dried fruit and other ingredients and to make the dough have a reasonable bread-dough consistency. You can tell when the dough is kneaded enough – a few raisins will start to fall off the dough onto the counter because at the beginning of the kneading process the dough is very sticky and the raisins will be held into the dough but when the dough is done it is tacky which isn't enough to bind the outside raisins onto the dough ball.

Lightly oil a large bowl and transfer the dough to the bowl, rolling around to coat it with the oil. Cover the bowl with plastic wrap.
Put it in the fridge overnight. The dough becomes very firm in the fridge (since the butter goes firm) but it does rise slowly… the raw dough can be kept in the refrigerator up to a week and then baked on the day you want.

Shaping the Dough and Baking the Wreath

1. Let the dough rest for 2 hours after taking out of the fridge in order to warm slightly.
2. Line a sheet pan with parchment paper.
3. Preheat oven to moderate 350°F/180°C/gas mark 4 with the oven rack on the middle shelf.
4. Punch dough down, roll into a rectangle about 16 x 24 inches (40 x 61 cms) and 1⁄4 inch (6 mm) thick.
Starting with a long side, roll up tightly, forming a long, thin cylinder.
Transfer the cylinder roll to the sheet pan. Join the ends together, trying to overlap the layers to make the seam stronger and pinch with your fingers to make it stick, forming a large circle. You can form it around a bowl to keep the shape.
Using kitchen scissors, make cuts along outside of circle, in 2-inch (5 cm) intervals, cutting 2/3 of the way through the dough.
Twist each segment outward, forming a wreath shape. Mist the dough with spray oil and cover loosely with plastic wrap.

Proof for approximately 2 hours at room temperature, or until about 11⁄2 times its original size.
Bake the stollen for 20 minutes, then rotate the pan 180 degrees for even baking and continue to bake for 20 to 30 minutes. The bread will bake to a dark mahogany color, should register 190°F/88°C in the center of the loaf, and should sound hollow when thumped on the bottom.

Transfer to a cooling rack and brush the top with melted butter while still hot.
Immediately tap a layer of powdered sugar over the top through a sieve or sifter.
Wait for 1 minute, then tap another layer over the first.
The bread should be coated generously with the powdered sugar.
Let cool at least an hour before serving. Coat the stollen in butter and icing sugar three times, since this many coatings helps keeps the stollen fresh - especially if you intend on sending it in the mail as Christmas presents!

When completely cool, store in a plastic bag. Or leave it out uncovered overnight to dry out slightly, German style.

Wednesday, December 22, 2010

Christmas Cookies-Just a Few...


I started making cookies for Christmas years before I changed my career from science to pastry. Maybe I was already moving in that direction, who knows. I grew up eating tea cookies in Italy, there are so many types, and many have either almonds or hazelnuts in them. I love to recreate the look and taste of those little morsels, and to lean new recipes from around the world.

Linzer Cookies

Every year I can't help but buy one of the cookie publications that come out just for Christmas, as a result I have a huge collection of recipes, some that I may never try, and they are all over the place. Recently though I started moving all the cookie recipes I make over and over into a little binder so I know where they all are. I am looking forward to adding to it years after years.

Checkerboard Cookies

This year I have made the cookies you see here, some are gluten free for my friends who don't eat gluten, and for me as well (being gluten free for a month, more on another post....).

Chocolate macaron/Coconut macaroons/Marasche

By far the recipe I have made the most is Dorie Greenspan's Korova cookies. I first saw them in her beautiful book Paris Sweets, then realized they are probably the best known cookies in cyberspace, even renamed World Peace Cookies because they induce such bliss and pleasure that the world would be a different place if we all ate them (I wish it were so simple...). I used to sell these cookies at a local farmers' market and they always sold out, I still get orders once in a while. The expression on people's faces when they first taste them is priceless, some sounds I heard cannot be repeated here, if you know what I mean....

Korova Cookies

If you google Korova cookies you get 13,600 links, if you google world peace cookies you get 848,000 (and if you google world peace only, the search engine puts them second). Incredible, isn't it? If you are still not convinced try them, they are amazing!

Use only the best quality of cocoa powder and chocolate, it makes a huge difference, and don't use regular salt, otherwise you lose the contrast of the two flavors.

Korova Cookies
a.k.a. World Peace Cookies
adapted from Dorie Greenspan

Ingredients

5 1/2 oz-150 gr butter, softened
2/3 cup-120 gr brown sugar, packed tight
1/4 cup-50 gr granulated sugar
1 1/4 cup-175 gr all purpose flour
1/3 cup-30 gr cocoa powder (the darker the better, I use Valhrona)
1/2 teaspoon baking soda
1/2 teaspoon fleur de sel or 1/2 teaspoon sea salt
5 oz-150 gr chocolate (use the best quality you can find, at least 64% cocoa)

Method

Pre-sift dry ingredients. Chop chocolate into small pieces. Beat butter and the two sugars until fluffy. Add the dry mixture and the salt. Mix just until the dry ingredients start getting incorporated. Add the chocolate and bring together, without over mixing the dough (the texture will be too tough if the dough is over mixed). Roll into three 12" logs, wrap, and freeze. Makes 1.5 pounds of dough. I normally double the recipe, roll it in six thin logs, and roll each on the short side of a sheet of parchment paper (which is 12"). They keep in the freezer for few weeks. Temper the logs for few minutes at room temperature before cutting thin slices. Bake at 325F until barely set (this is tricky as they are really dark, when you test them they should not be super soft, but still give a little, if they are completely set/hard when you take them out of the oven they are over cooked).

Happy Holiday and Peace to all!

Monday, December 6, 2010

Doughnuts Round II-Jelly Doughnuts that is...


I brought these fantastic jelly doughnuts to my friend's Suzanne's house for Hanukkah, needless to say they didn't last long. As you may remember, I decided to try all the doughnut recipes of the October Daring Baker's challenge since I wasn't able to participate, and started with the pumpkin doughnut recipe. I was about to try a second recipe but when I saw these in Elra' s blog, I had to try them, they looked so tasty. I used the recipe as given by Martha Stewart, but let the dough rise during the day, for about two hours. I tried both the method given in the recipe of sandwiching the jam in between two disks of dough, and the method of injecting the jam after the frying. Injecting not only is faster, but results in better looking doughnuts. If you don't have a pastry bag and the tip to inject the jam, use the method given by MS.

Happy Hanukkah!


Ingredients

Makes about 20.

  • 3/4 cup warm water (about 110 degrees)
  • 1 envelope active dry yeast (1 scant tablespoon)
  • 2 1/2 cups all-purpose flour, plus more for dusting
  • 1/4 cup sugar, plus 1/2 cup for coating
  • Pinch of salt
  • 2 large eggs, separated
  • 2 tablespoons margarine or unsalted butter, room temperature
  • Peanut oil, for frying, plus more for bowl
  • 1/4 cup raspberry or strawberry jam or jelly

Directions

  1. In a large bowl, stir together the warm water and yeast. Let stand until foamy, about 5 minutes. Add 3/4 cup flour, 1/4 cup sugar, and salt; mix until well combined. Add egg yolks and remaining 1 3/4 cups flour. Mix until combined, then knead dough in bowl until all flour is incorporated. Turn out onto a lightly floured work surface; knead a few minutes until smooth. Knead in margarine until incorporated.
  2. Transfer dough to a well-oiled bowl, turning several times to coat entirely with oil. Cover tightly with plastic wrap, and refrigerate overnight.
  3. Bring dough to room temperature, about 30 minutes. On a lightly floured work surface, roll out dough into an 11-inch square, about 1/4 inch thick. Cut out about 24 (2-inch) rounds. Reroll scraps; cut out about 16 more rounds.
  4. Line a baking sheet with a clean kitchen towel. In a small bowl, lightly beat egg whites. Brush edge of a dough round with egg white, then mound 1/2 teaspoon jam in center. Top with another round; press edges to seal. Repeat with remaining rounds. Transfer to prepared baking sheet; let rise until puffy, 20 to 30 minutes.
  5. Heat 3 inches of oil in a large, heavy pot until it reaches 360 on a deep-fry thermometer. Working in batches of 4 or 5, slip doughnuts into hot oil. Fry, turning once, until golden brown, about 1 minute. Using a slotted spoon, transfer doughnuts to paper towels to drain.
  6. While doughnuts are still hot, dip them in remaining 1/2 cup sugar, turning to coat. Serve immediately.

Saturday, November 27, 2010

Daring Bakers-Apple and Lavender Crostata

I finished on time this month, yeah! Ironically, I made the same crostata for Thanksgiving but forgot to take a picture of it, and probably it was for the better as by the time it came out of the oven there was no day light to take a picture of it. I served it with caramel ice cream, and it was devoured. This tart went in the oven that it was almost dark so the pictures are really bad, plus it is really hard to take pictures of brown food, see the difference with the rose photo, taken at the same time.


The 2010 November Daring Bakers’ challenge was hosted by Simona of briciole. She chose to challenge Daring Bakers’ to make pasta frolla for a crostata. She used her own experience as a source, as well as information from Pellegrino Artusi’s Science in the Kitchen and the Art of Eating Well.

Not sure how to fix the following format, I tried everything, short of rewriting the post, not sure how it happened, apologies.....

When people ask me what my specialty is as a pastry chef I immediately say tarts and cookies, so I was happy to have the excuse to make a crostata for the DB challenge, I will never tire of them. A crostata is essentially a tart, in Italy we mostly make two types, the classic version with pastry cream and fresh fruit, and the one with jam and a lattice top. Because of my love for fresh fruit tarts (crostate), I started making them in college whenever I was going somewhere for dinner, soon I was making them all the time, just so I could eat them. Crostate sealed my fate I believe, as I started trying different versions and never stopped. I believe that what attract me of this dessert is the endless variations. The crust can be flavored by adding lemon zest, vanilla, or ground nuts, and it can be baked blind or with the filling, depending on the recipe. The sky is the limit when it comes to the filling, as you can see from the many versions of other daring bakers. You can find the complete recipe here.

Simona, whom I first met in cyber space and then in real life, gave us two versions of pasta frolla to try, and complete freedom when it came to the filling. Pasta frolla is a type of paté sucree, and it is made by just making a mound of flour, adding the butter in pieces, and binding everything with an egg or few yolks, it comes together in minutes and it is delicious. I struggled for few days to decide what to make, since there are so many fantastic flavors I could have used. This particular tart became my favorite for a while, I first saw it in the 1992 book Savory to Sweet: Pies and Tarts, which is no longer published. I have made this tart dozen of times, it is not only stunning but also delicious. This tart comes from Normandie, a region in France where they grow apples and lavender, thus the pairing of the two in this tasty tart. The recipe for frangipane is mine, the one from the book is a little too rich for my taste. You can omit the lavender if you prefer (I used a tablespoon), but I urge you to try it, it goes really well with the apples.

This bad photo reminds me of pre-digital photos from the 60's, but can't do better than this

Pasta frolla

Ingredients:

  • 1/2 c. minus 1 tablespoon [105 ml, 100 g, 3 ½ oz] superfine sugar (see Note 1) or a scant 3/4 cup [180ml, 90g, 3 oz] of powdered sugar
  • 1 and 3/4 cup [420 ml, 235 g, 8 1/4 oz.] unbleached all-purpose flour
  • a pinch of salt
  • 1 stick [8 tablespoons / 4 oz. / 115 g] cold unsalted butter, cut into small pieces
  • grated zest of half a lemon (you could also use vanilla sugar as an option, see Note 2)
  • 1 large egg and 1 large egg yolk, lightly beaten in a small bowl

Note 1: Superfine sugar is often also referred to as ultrafine, baker’s sugar or caster sugar. It’s available in most supermarkets. If you cannot find “superfine” sugar, you can make your own by putting some regular granulated sugar in a food processor or blender and letting it run until the sugar is finely ground.

Note 2: There are different ways of making vanilla sugar. I keep vanilla beans in a jar half-filled with sugar until I need to use them, for example, to make vanilla ice cream. After I remove the split bean from the custard that will go into the ice cream maker, I rinse it, dry it and put it back in the jar with sugar.

Making pasta frolla by hand:

  1. Whisk together sugar, flour and salt in a bowl.
  2. Rub or cut the butter into the flour until the mixture has the consistency of coarse crumbs. You can do this in the bowl or on your work surface, using your fingertips or an implement of choice.
  3. Make a well in the center of the mounded flour and butter mixture and pour the beaten eggs into it (reserve about a teaspoon of the egg mixture for glazing purposes later on – place in the refrigerator, covered, until ready to use).
  4. Add the lemon zest to your flour/butter/egg mixture.
  5. Use a fork to incorporate the liquid into the solid ingredients, and then use your fingertips.
  6. Knead lightly just until the dough comes together into a ball.
  7. Shape the dough into a flat disk and wrap in plastic wrap. Place the dough in the refrigerator and chill for at least two hours. You can refrigerate the dough overnight.


Making pasta frolla with a food processor:

  1. Put sugar, flour, salt, and lemon zest in the food processor and pulse a few times to mix.
  2. Add butter and pulse a few times, until the mixture has the consistency of coarse meal.
  3. Empty food processor's bowl onto your work surface
  4. See step 3 above and continue as explained in the following steps (minus the lemon zest, which you have already added).

Variation for Version 1 of pasta frolla:

If you want, you can make the pasta frolla using a combination of all-purpose flour and whole-wheat pastry flour.

If you choose to try this variation, use 1 cup [240 ml, 135 g, 4 3/4 oz.] unbleached all-purpose flour and 3/4 cup [180 ml, 100 g, 3.5 oz.] whole-wheat pastry flour.


Frangipane


4 oz. butter, at room temperature
1/2 Cup sugar (100 gr)
1 egg
2 Cups ground almonds (hazelnuts would work as well)

In the bowl of an electric mixer, beat the butter and the sugar until fluffy, add the egg, and beat until well incorporated. Scrape the side of the bowl and add the ground almonds. Spread evenly in the unbaked tart shell. Frangipane keeps few days in the refrigerator and can be frozen for weeks.

Assembly:

Peel, halve, and core 4 apples (I used Golden delicious). Cut each half in very thin slices, keeping the pieces together. Sprinkle one tablespoon of lavender flowers on the unbaked shell, then spread the soft frangipane on top. Add the sliced apples fanning the slices as shown in the pictures. Bake at 350F until the frangipane is set and the apples start to color. Brush the top with diluted and strained apricot preserve to give the tart a beautiful shiny look (warm up few tablespoons of jam with a little water, bring to a boil and then strain any fruit pieces out).

Many thanks to Ivonne of Cream Puffs in Venice and Lisa of La Mia Cucina, founders of Daring Bakers, and to Simona for choosing this month's challenge.

Tuesday, November 9, 2010

Squash Doughnut-A Daring Bakers Challenge


I have been a member of the Daring Bakers since March 2009 and sadly I haven't been able to participate every month. October's deadline caught me by surprise while working part time for a caterer. I was working so hard I didn't even realized it was the 27th until I started seeing doughnut posts going up. I really wanted to try participating in the doughnut challenge, especially since there were so many variations to choose from. Doughtnuts have been having a ranaissance lately, recipes have popped up in many food blogs, and Lara Ferroni, a very talented food photographer, just came out with a doughnut book. Since I missed the deadline, I challenged myself to eventually try all the recipes we were given to choose from, and started with the pumpkin doughnuts, which are not leavened by yeast, but by baking powder and soda instead. The recipe is really straightforward and simple. I used roasted Cabocha squash instead of the canned pumpkin for convenience, since I had it at home, and for flavor as well. The taste and consistency reminded me of little doughnuts called Castagnole, normally prepared in Italy during the Carnival. Needless to say, they went fast!


The October 2010 Daring Bakers challenge was hosted by Lori of Butter Me Up. Lori chose to challenge DBers to make doughnuts. She used several sources for her recipes including Alton Brown, Nancy Silverton, Kate Neumann and Epicurious.

I added the post lines just for the sake of being correct, and presented the recipe as written by Lori. I hope you will try it as it is worth it.


Pumpkin Doughnuts

Preparation time:
Hands on prep time - 15 minutes
Chilling time - 3 hours
Cooking time - 10 minutes

Yield: About 24 doughnuts & 24 doughnut holes

Ingredients
All Purpose Flour 3.5 cup / 840 ml / 490 gm / 17 ¼ oz
Baking Powder 4 teaspoon / 20 ml / 24 gm / .85 oz
Table Salt 1 teaspoon / 5 ml / 6 gm / .2 oz
Cinnamon, ground 1 teaspoon / 5 ml / 6 gm / .2 oz
Ginger, ground ½ teaspoon / 2.5 ml / 3 gm / .1 oz
Baking Soda ½ teaspoon / 2.5 ml / 3 gm / .1 oz
Nutmeg, ground ¼ teaspoon / 1.25 ml / 1.5 gm / .05 oz
Cloves, ground 1/8 teaspoon / .6 ml / ¾ gm / .025 oz
White Granulated Sugar 1 cup / 240 ml / 225 gm / 8 oz
Butter, Unsalted 3 Tablespoon / 45 ml / 42 gm / 1.5 oz
Egg, Large 1
Egg Yolk, Large 2
Pure Vanilla Extract 1 teaspoon / 5 ml
Buttermilk 1/2 cup + 1 Tablespoon / 135 ml /
Pumpkin 1 cup / 240 ml / 285 gm / 10 oz (Canned pure pumpkin or fresh cooked and pureed pumpkin – DON’T use pumpkin pie mix!) I used squash instead
Canola Oil DEPENDS on size of vessel you are frying in – you want THREE (3) inches of oil (can substitute any flavorless oil used for frying)

Powdered Sugar Glaze:

Powdered (Icing) Sugar 2 cup / 480 ml / 250 gm / 9 oz
Whipping Cream (About 32% butter fat) 4 Tablespoon + more if needed / 60 ml

Directions:

  1. Whisk together the first 8 ingredients in medium bowl to blend. Using electric mixer, beat sugar and butter in large bowl until blended (the mixture will be grainy and not smooth). Beat in egg, then yolks and vanilla. Gradually beat in buttermilk; beat in pumpkin. Using rubber spatula, fold in dry ingredients in 4 additions, blending gently after each addition. Cover with plastic; chill 3 hours.
  2. Sprinkle 2 rimmed baking sheets lightly with flour. Press out 1/3 of dough on floured surface to 1/2- to 2/3-inch (12 mm to 15 mm) thickness. Using 2 1/2-inch (65 mm) -diameter round cutter, cut out dough rounds. Arrange on sheets. Repeat with remaining dough in 2 more batches. Gather dough scraps. Press out dough and cut out more dough rounds until all dough is used.
  3. Using 1-inch (25 mm) diameter round cutter, cut out center of each dough round to make doughnuts and doughnut holes.
  4. Line 2 baking sheets with several layers of paper towels. Pour oil into large deep skillet to depth of 1 1/2 inches (40 mm). Attach deep-fry thermometer and heat oil to 365°F to 370°F (185°C to 188°C). Fry doughnut holes in 2 batches until golden brown, turning occasionally, about 2 minutes. Using slotted spoon, transfer to paper towels to drain. Fry doughnuts, 3 or 4 at a time, until golden brown, adjusting heat to maintain temperature, about 1 minute per side. Using slotted spoon, transfer doughnuts to paper towels to drain. Cool completely.
Sugar Glaze
  1. Whisk powdered sugar and 4 tablespoons whipping cream to blend. Whisk in additional cream, 1 teaspoon at a time, to form medium thick glaze.
  2. Can be made up to 3 hours ahead.
  3. Add doughnut holes to bowl of spiced sugar and toss to coat.
  4. Spread doughnuts on 1 side with powdered sugar glaze.
  5. Arrange doughnuts, glazed side up, on racks. Let stand until glaze sets, at least 30 minutes.

Saturday, November 6, 2010

Caramel Ice Cream


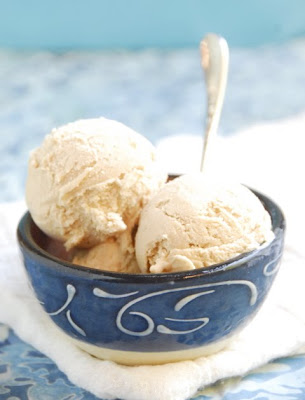
I am not in a fall funk anymore, I have embraced the fall fruits to the fullest, and am getting excited by the endless possibilities. Last night I needed an ice cream to go with an apple tart Tatin I made for some friends who came over for dinner. At the risk of almost repeating myself, I decided to try another caramel ice cream, because caramel and apples were made for each other, don't you agree? This time I used a recipe I found in Emily Luchetti's A Passion for Ice Cream, and I want to share it as it is one of the best ice creams I have made (and it was a pleasure to hear how much my guests loved it too, especially Rahel). I have spoken about this super talented pastry chef before, her books are amazing and a constant font of inspiration and awesome recipes. This ice cream recipe is no different, just perfect. I only added some fresh ginger since the ice cream was the closing note on an Asian inspired dinner.

There are two ways to caramelize sugar, a "wet" method that uses water, and a "dry" method where the sugar is melted directly. I have had plenty of wet caramel batches crystallize before my eyes, so I now exclusively use the dry method for small batches of caramel. The recipe calls for the wet method. Whatever method you use, watch the pot and when the sugar starts turning color, lower to flame. The caramel has to be a medium/dark color to have plenty of flavor, but not too dark that tastes burnt.


Most ice cream recipes containing eggs call for heating the egg/cream mixture over the stove to custard consistency. This step is unnecessary if the cream mixture is bubbly hot when tempering the yolks, the temperature is high enough to custard the yolks. By doing it this way, you won't run the risk of overcooking the yolks.


Caramel Ice Cream
adapted from Emily Luchetti

7 large egg yolks
1 cup sugar
1/2 cup water
2 1/2 cup heavy whipping cream
2 oz of fresh ginger, thinly sliced

1/2 tsp kosher salt
2 cups milk

In a heavy sauce pan, stir together the sugar and water and cook over medium heat, stirring occasionally, until the sugar has dissolved. Increase the heat to high and cook, without stirring, until the sugar is medium amber in color. Remove from the heat. Slowly pour 1/4 cup of cream until combined. Be careful as the cream will bubble up and splatter. Add the remaining cream, 1/4 cup at the time, whisking after each addition. Add the ginger pieces and cook on low until all the caramel has dissolved. Turn the heat off and let the ginger steep for an hour. Reheat the caramel to almost boiling, pour it into the yolks to slowly temper and custard them. The caramel base should be thick enough to coat the back of a spoon. To immediately cool the custard, add the cold milk and the salt. Strain the ice cream base and chill completely. Freeze according to your ice cream machine.

Sunday, October 31, 2010

Chocolate Thumbprint with Chocolate Ganache


The search for new cookie recipes has started. Even before entering the path of becoming a pastry chef I was making Christmas cookies, something that gives me great satisfaction. My selection consists of some traditional cookies, like ginger cookies, cookies with nuts, and cookies that look good together, a contrast of color and textures. While I have a great collection of recipes already, I am always on the lookout for recipes that are different, interesting, and can work in miniature form as I like the cookies to be small. I saw the recipe for these dainty cookies here, a lovely Italian blog called Brodo di Giuggiole. The recipe originally comes from Martha Stewart and you can find it here. I didn't change a thing as they are delicious, maybe I would try to add some nut flour and some spice. The recipe works out well, the cookies are easy to shape, and they taste intensely chocolate. The only set back was that they lost a little bit of shape as they baked.

Chocolate Thumbprints
adapted from Martha Stewart

Ingredients:
  • 2 cups all-purpose flour
  • 1 cup plus 1 tablespoon unsweetened Dutch-process cocoa powder
  • 2 teaspoons coarse salt
  • 8 ounces (2 sticks) unsalted butter, softened
  • 1 1/3 cups sugar, plus more for rolling
  • 2 large egg yolks
  • 2 tablespoons heavy cream
  • 2 teaspoons pure vanilla extract
Directions:

1. Preheat oven to 350 degrees. Sift flour, cocoa powder, and salt into a small bowl. Cream butter and sugar with a mixer until pale and fluffy. Reduce speed to medium, and add yolks, cream, and vanilla. Scrape sides of bowl. Beat in flour mixture until just combined.
2. Roll balls using 2 teaspoons dough for each, and roll each in sugar. Place 1 inch apart on parchment-lined baking sheets. With the handle of a wooden spoon, press gently in the center of each to create an indentation. Bake, rotating sheets halfway through, until cookies are just set, about 10 minutes. (If indentations lose definition, press centers again.) Let cool slightly on baking sheets. Transfer cookies to wire racks, and let cool.
3. Spoon warm ganache into center of each cookie. Let stand until firm, about 15 minutes. Cookies will keep, covered, for up to 3 days.

I used a white chocolate macha ganache for the centers. The idea was to have a really green center for Halloween, but it didn't quite work as my macha was an off-green color and didn't really turn the chocolate green enough. Maybe I needed to add more.

White Chocolate Ganache
adapted from Alice Medrich

  • 6 oz white chocolate, chopped small
  • 2 oz heavy whipping cream
  • 2 teaspoon macha
Chop chocolate in a food processor. Bring cream to a boil and then pour into the chocolate with the mixer running. Process until all the chocolate is melted and the ganache is smooth. If it breaks, like it happened to me, remove from the food processor, add some cold cream to the bowl of the food processor and while running slowly pour the broken ganache into the bowl. This should fix it.


Sunday, October 17, 2010

Roasted Pears & Pear-Caramel Ice Cream


Autumn has officially arrived in the Bay Area so it is time to switch the dessert repertoire, and since I believe that ice cream should be eaten year round I decided to try this full-of-promises ice cream from The Perfect Scoop. David Lebovitz doesn't fail to deliver another amazing recipe, and if you don't have any of his books, run to the bookstore. David suggests using very flavorful pears to stand up to the slightly bitter caramel flavor, and recommends using Comice or Barlett. I decided to try asian pears instead, very delicate in flavor, and very perfumed. According to this site the variety I used is called JunoSan, with a reddish brown skin. I added fresh sliced ginger to the caramel to add an extra kick, and that worked really well. The ice cream was paired with pears baked with an almond streusel (I used the Taylor Gold variety, which were a little delicate but really good and juicy). The dessert was light, easy, and really tasty.

Pear-Caramel Ice Cream
adapted from The Perfect Scoop

3 medium-sized pears, peeled and cored
3/4 cups plus 2 TBS (180 gr) sugar
2 oz (60 gr) fresh ginger root, peeled and sliced thin
2 cups (500 ml) heavy whipping cream
1/8 tsp kosher salt

Spread the sugar in a heavy-bottomed saucepan. As the sugar starts to liquefy, shake the pan to let the liquid sugar heat and melt the remaining sugar crystals. When all the sugar is melted and a deep amber color, add the pear and the ginger pieces (remember to count the pieces of ginger as you want to remove them all before pureeing the ice cream base). Don't worry if some of the sugar solidifies. Cook the pears for ten minutes until softened through, stirring so all the caramel will melt again. Remove from the heat, add the cream and the salt, and let cool. Remove the ginger pieces, then puree the mixture in a food processor. Strain the mixture to remove any tough pear pieces if you wish (I didn't and I liked the extra texture). Chill completely, then freeze according to your ice cream maker.


Baker Pears with Almond Streusel

Peel and core the pears, add three tablespoons of streusel to each half. Bake at 375F until soft and the top is nicely browned. Use either one or two half pears per serving, depending on the size.

Saturday, October 9, 2010

Imagine


Imagine there's no Heaven
It's easy if you try
No hell below us

Above us only sky

Imagine all the people

Living for today

Imagine there's no countries

It isn't hard to do
Nothing to kill or die for

And no religion too

Imagine all the people

Living life in peace

You may say that I'm a dreamer

But I'm not the only one
I hope someday you'll join us
And the world will be as one
Imagine no possessions
I wonder if you can
No need for greed or hunger

A brotherhood of man

Imagine all the people

Sharing all the world

You may say that I'm a dreamer

But I'm not the only one

I hope someday you'll join us

And the world will live as one


John and Yoko stayed in the house we own for few weeks. The house is very special for a variety of reasons, and the legacy of John's presence makes it even more so. This song is so inspiration, and I wish more people would live by its meaning.
"Ono indicated that the lyrical content of "Imagine" was "just what John believed — that we are all one country, one world, one people. He wanted to get that idea out."

Monday, October 4, 2010

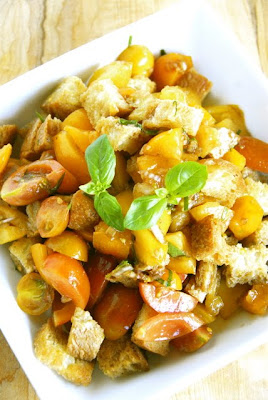
Panzanella-My way


I just spent two hours picking my tomato plants clean of ripe tomatoes, cutting many of the leaves to allow for more sun to hit the remaining fruit, and harvesting lots of basil before the cold weather kills the plants. It is a warm and sunny Autumn day in the Bay Area, so I am hoping for more ripe tomatoes in the next week or so. Every year in July I tell myself that I will not plant that many tomato plants again, but then in September and October I change my mind when I get to eat the fruit of my labor.


Panzanella is a summer salad originated in Tuscany, and like many dishes of the "cucina povera" (literally poor cuisine), it is a way to use stale bread, Ribollita is another example. A little olive oil and balsamic vinegar turn this simple dish into something delicious. I don't know you, but I could eat tomatoes all summer long.


There are many versions of this dish and traditionally the bread is soaked in water before adding it to the tomatoes. I like mine with plenty of basil and a shallot vinaigrette made with balsamic vinegar, which is a little French I guess. Sometimes I add cucumber, string beans, or corn to the salad.

Panzanella

2 C bread, cut in cubes
1 T extra virgin olive oil

3 C tomatoes
1 medium shallot
1 T balsamic vinegar
1 T extra virgin olive oil
Basil, salt and pepper to taste

Sprinkle the bread cubes with 1 TBS of oil and bake at 350F until dry and lightly colored. While the bread is in the oven, mince the shallot and add it to the vinegar (this will soften the onion and impart a nice flavor to the vinegar), marinate for 30 minutes. Add the remaining oil to the vinegar, mix well, add to the tomatoes and their juices, toss with the cooled bread cubes, and adjust the seasoning to your taste. Serves two.

Buon Appetito!

Monday, September 27, 2010

Daring Bakers-Decorated Sugar Cookies


I can't believe I missed the past two Daring Bakers' challenges. Both challenges were super fun but I just didn't have it in me to participate, I would have done a semi good job.

The September 2010 Daring Bakers’ challenge was hosted by Mandy of “What the Fruitcake?!” Mandy challenged everyone to make Decorated Sugar Cookies based on recipes from Peggy Porschen and The Joy of Baking.

This new challenge was fun, fun, fun, so thank you Mandy! Mandy challenged us to make the cookies, which were straight forward and simple, and decorate them, which was challenging! She also gave up free range for the theme, which had to do with the month of September. First of all I love making cookies of all sorts, and to decorate them it is even better. It took me a while to decide what to use as the theme, as I quite never thought of September as a month that has a particular meaning (besides the marking of a new school year). I first thought of making flowers, then I thought of leaves as it is Autumn after all, but apparently in don't own either shape in my huge collection of cookie cutters, not sure how this happened. I then decided to try this composition I saw years ago in a cake store as a sample for their cookie decorating class. I thought it was so beautiful and clever, and for years I have wanted to make it but never got around to it. I thought it was great to start early on Halloween, one of my favorite times of the year. I don't think that this cookie will be eaten, we'll keep it for decoration.

The recipe is really easy, the cookies are not too sweet and like Mandy mentioned they really don't spread that much, keeping their shape pretty well. I baked them at 325 F as I do for all the cookies, this way they color more evenly and I never risk over baking them if I forget to check them often. I used vanilla as flavoring, but lemon zest would have been even better. The royal icing is also straight forward, Mandy's instructions are really detailed. Decorating took a lot of patience, as you have to wait for the icing to dry, in my case it was so hot that it took no time at all.

How can you resist this face?

Outlining...

Basic Sugar Cookies:
Makes Approximately 36x 10cm / 4" Cookies

200g / 7oz unsalted butter, at room temperature
400g / 14oz all purpose flour
200g / 7oz / caster sugar / superfine sugar
1 large egg, lightly beaten
5ml / 1 tsp vanilla extract / or seeds from 1 vanilla bean

Directions
• Cream together the butter, sugar and any flavorings you’re using. Beat until just becoming
creamy in texture.
• Beat in the egg until well combined, make sure to scrape down the sides of the bowl.
Add the sifted flour and mix on low until a non sticky dough forms.
• Knead into a ball and divide into 2 or 3 pieces.
• Roll out each portion between parchment paper to a thickness of about 5mm/1/5 inch (0.2 inch)
• Refrigerate for a minimum of 30 minutes.
• Once chilled, peel off parchment and place dough on a lightly floured surface.
• Cut out shapes with cookie cutters or a sharp knife.
• Arrange shapes on parchment lined baking sheets and refrigerate for another 30mins to an hour.
• Re-roll scraps and follow the above process until all scraps are used up.
• Preheat oven to 180°C / 350°F.
• Bake until golden around the edges, about 8-15 minutes depending on the size of the cookies.

Royal Icing:

315g – 375g / 11oz – 13oz / 2½ - 3 cups icing / confectioner’s / powdered sugar, unsifted
2 large egg whites
10ml / 2 tsp lemon juice
5ml / 1 tsp almond extract, optional

Directions

• Beat egg whites with lemon juice until combined.
• Sift the icing sugar to remove lumps and add it to the egg whites.
Tip: I’ve listed 2 amounts of icing sugar, the lesser amount is good for a flooding consistency, and the larger amount is for outlining, but you can add even more for a much thicker consistency good for writing. If you add too much icing sugar or would like to make a thinner consistency, add very small amounts of water, a few drops at a time, until you reach the consistency you need.
• Beat on low until combined and smooth.
• Use immediately or keep in an airtight container.

Thanks go to Cat for choosing this month's challenge and to Lisa of La Mia Cucina and Ivonne of Cream Puffs in Venice, the creators of the Daring Bakers' challenge. To check other daring bakers' creations, please check the daring kitchen's site. To see the complete recipe and more detailed information on how to decorate please check Mandy's post here.

Thursday, September 23, 2010

Baked Peaches, Zabaglione Cream, and Streusel


I love summer for many reasons, one being the variety and deliciousness of stone fruit, so it is a sad day for me when I step into my local grocery store and all I see are apples and pears (I love pears and apples, don't get me wrong, but let's face it, they can't compete with stone fruit). Today was the day I sadly realized that the summer season is over, fall is here, and I have to change my baking flavors. I luckily had some wonderful baked peaches in the fridge so I made this flavorful dessert to say goodbye to summer and welcome fall.

This dessert is a winning combination for a dinner party as all the components are made ahead of time, all you need to do is assemble them on a plate. Baking the peaches concentrate the flavor, not to mention the wonderful color that the skin imparts to the pulp. For the best result buy free stone fruits so the pit comes off easily. The fruit should be perfectly ripe for the skin to come off easily, best is to buy the fruit 2 to 3 days before you plan to serve them.

Zabaglione is traditionally made with Marsala, but I prefer to use more delicate sweet wines, like Port, Sauternes, or Passito.

Almond Streusel
8 oz finely ground almonds (pistachios will work really well too)
8 oz sugar
8 oz all purpose flour
8 oz cold butter, cut in pieces
Mix the dry ingredients in the bowl of an electric mixer fitted with the paddle attachment. Add the cold butter and mix until it just starts coming together. Cool for at least an hour in the refrigerator (the unbaked streusel keeps for few days). When ready to bake, pre-heat the oven to 325F. Spread the desired amount on a baking sheet lined with a silpat or parchment paper and bake for 10 minutes. When the sides start coloring, remove the pan from the oven and break any lumps with a bench scraper, mixing the streusel for even baking. Cook for another 5 minute and repeat the mixing, so no lumps form. When the streusel in nicely colored but still soft looking, remove it from the oven, repeat the breaking of the lumps one more time and cool completely. Keep in an airtight container. This is such an amazing recipe and it can be made with other nuts, and sprinkled on anything. Warning, it is addictive!


Baked Peaches

8 free stone peaches (yellow or white)
1/2 cup sweet wine (same wine use for the zabaglione)
sugar to taste

Cut the fruit in half and remove the pit. Bake at 400, cut down, covered with aluminum foil, until tender but not mushy (10-15 minutes). Let cool, remove the skin, and cover with the pan juices. Refrigerate until needed.


Zabaglione Cream

8 yolks
1/3 cup sugar
3/4 cup sweet wine (Port, Sauternes, or Passito)

1 cup heavy whipping cream, whipped

Mix the yolks, the sugar, and the wine in a stainless steel bowl. Adjust the bowl on a pan of boiling water so the bottom doesn't touch the water. Cook the zabaglione whisking constantly. To make it more stable, cook it until it deflates and is very creamy, 15-20 minutes. Strain it and let it cool completely on an ice bath. Whip the cream to stiff peaks and fold it into the zabaglione. Keep refrigerated at all times.

Sunday, September 12, 2010

Panini con l'uvetta-Raisin rolls


Well...I have some news...I have not been working for two months but I will spare the details for a variety of reasons. I can't believe that I haven't posted in so long, the past two months have been interesting to say the least, a whirlwind of things; my job ended, my husband broke his ankle and had surgery to repair it (guess who is doing all the driving?), we had a 15 year old visiting from Italy for two months, and then my best friend Paola and her daughter visited from Venice. It was such pleasure having Paola here, and being a great hiker and nature lover I took her to all my favorite places around town, what a blast! I wish she could come here often, two weeks just flew by.

The three months I worked were very exciting but really crazy, opening a brand new restaurant is really hard but very rewarding and I have learned tons. I had never worked such long hours in my life, sometimes 6-7 days a week, I had time for very little, and the blog was seriously neglected. I am now getting some well deserved sleep as waking up at 4:30 for weeks was taking a toll. I started exercising almost every day and I feel great. My garden and house plants are getting some TLC that they desperately needed, and I am enjoying the final days of string beans, cucumbers, tomatoes and basil. The house is getting organized and I am finally baking for my family.

Remember these? When I first tasted them I immediately recognized the flavor, having eaten something very similar all my childhood. I immediately loved the flavor and the texture of these little morsels, and in an effort to create a sweet treat to sell at my dream bakery, I took this recipe out and started working on it. I increased the butter and added sugar, eggs, and raisins to the dough. I didn't change the method, and the water content is the same because I wanted a dough at a higher hydration to compensate for the dry raisins that would absorb some water from the dough.

The resulting bread is really similar to the panini con l'uvetta I grew up eating in Venice as snacks after school, and that is exactly the flavor I was trying to replicate. I am submitting this bread to the wonderful weekly showcase of yeasted bread in Susan's blog, yeastspotting.


Pane all'uvetta-Raisin bread

Biga
200 g bread flour (if you don't have it, use all purpose)
5 g fresh yeast or 1/4 tsp dry yeast
170 ml water

- Dissolve the yeast in the water and quickly work the dough together in a small bowl.
- Cover the biga and let it develop for 15-24 hrs.

Dough
200 ml water, lukewarm
15 g fresh yeast or 2 tsp dry yeast

all the biga
500 g all purpose flour
25 g extra-virgin olive oil
2 large eggs
50 g sugar
12 g salt

50 g butter
150 g raisins

- Dissolve the yeast in the water.
- Add all the ingredients, except the butter and raisins, into the bowl of an electric mixer.
- Work the dough with the hook attachment until it is smooth and doesn't stick to the mixer bowl. Adjust the amount of flour to create a soft and somewhat wet dough.
- Add the softened butter slowly, then mix at low speed for 5 minutes to let the dough develop.
- Add the raisins and mix only until just incorporated (mixing more will break the raisins)
- Pour the dough onto a well floured surface and let rest for 5 minutes.
- Stretch the dough with your hands, fold it like an envelope and form it into a ball, cover it and let rest for 30 minutes. This will further develop the gluten and distribute the raisins evenly.
- Repeat the stretching and folding a second time.
- Put the dough into a container, cover it and leave to rise until doubled (at this point you can refrigerate it overnight).
- After the dough has doubled, divide it into smaller parts, about 70 g/2,5 oz each.

To see how to shape each piece of dough please check Ilva's or Lien's websites.

1. Roll out each portion into long strands and lay them out on a flat surface.
2. Make a semi-circle with a dough strand.
3. Twist the two ends together.
4. Bring the two ends towards the upper part of the circle.
5. Lift/fold the top part over the twisted part.
6. Take the two ends and join them together under the knot, this will make the knot part come out more and will hide the ends.

- Put the knots on baking sheets, brush them with an egg wash, and let them rise until they have doubled in size. Brush them again once risen, before baking.
- Bake in a pre-heated oven (200°C/390°F) for 20-25 minutes.


Wednesday, June 23, 2010

Happy Birthday Little One


This is not one of the best pictures, and I hope to take better ones tomorrow. Today, on my birthday, this little chick was born. One of our chickens stopped laying eggs and started brooding, which is really common in the spring, and she would sit on eggs constantly. Concerned that this cycle would not stop and she would get weaker and weaker we found some fertilized eggs for her and she has happily kept them warm. Today this little chick was born and I helped another one come out of a partially cracked egg, what an amazing experience. I am just amazed at the instincts of our bantam chicken, she was raised by us in a little box but she totally knows what to do and is so gentle and attentive. Nature rules.

Thursday, May 27, 2010

Daring Bakers-Piece Montée or Croquembouche


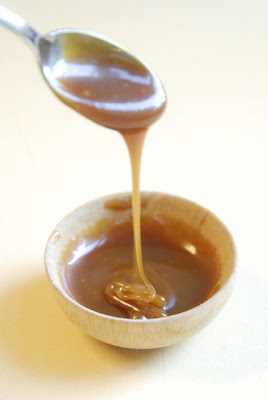
I am not sure how I managed to publish this on time. The restaurant I am working at just got the permit from the health department yesterday and we are working like crazy to open next week, my life revolves around this now. I will write more about this new adventure in another post, there is so much to say. Knowing that the 27th would be crazy I made the little paté a choux on Saturday instead, as dessert for a group of friends that came over for dinner. I filled them with a meyer lemon cream and accompanied by a sinful caramel sauce (I will have to write another post with the recipes). They were delicious but I would love to try all the other variations of the pastry cream you can see below, but this is for another time.


The May 2010 Daring Bakers’ challenge was hosted by Cat of Little Miss Cupcake. Cat challenged everyone to make a piece montée, or croquembouche, based on recipes from Peter Kump’s Baking School in Manhattan and Nick Malgieri.


Pate a Choux (Yield: About 28)

¾ cup (175 ml.) water
6 Tbsp. (85 g.) unsalted butter
¼ Tsp. salt
1 Tbsp. sugar
1 cup (125 g.) all-purpose flour
4 large eggs

For Egg Wash: 1 egg and pinch of salt.

Pre-heat oven to 425◦F/220◦C degrees. Line two baking sheets with parchment paper.

Preparing batter:
Combine water, butter, salt and sugar in a saucepan over medium heat. Bring to a boil and stir occasionally. At boil, remove from heat and sift in the flour, stirring to combine completely. Return to heat and cook, stirring constantly until the batter dries slightly and begins to pull away from the sides of the pan. Transfer to a bowl and stir with a wooden spoon 1 minute to cool slightly. Add 1 egg. The batter will appear loose and shiny. As you stir, the batter will become dry-looking like lightly buttered mashed potatoes. It is at this point that you will add in the next egg. Repeat until you have incorporated all the eggs.

Piping:
Transfer batter to a pastry bag fitted with a large open tip (I piped directly from the bag opening without a tip). Pipe choux about 1 inch-part in the baking sheets. Choux should be about 1 inch high about 1 inch wide.
Using a clean finger dipped in hot water, gently press down on any tips that have formed on the top of choux when piping. You want them to retain their ball shape, but be smoothly curved on top. Brush tops with egg wash (1 egg lightly beaten with pinch of salt).

Baking:
Bake the choux at 425◦F/220◦C degrees until well-puffed and turning lightly golden in color, about 10 minutes. Lower the temperature to 350◦F/180◦C degrees and continue baking until well-colored and dry, about 20 minutes more. Remove to a rack and cool.

Filling:
When you are ready to assemble your piece montée, using a plain pastry tip, pierce the bottom of each choux. Fill the choux with pastry cream using either the same tip or a star tip, and place on a paper-lined sheet. Choux can be refrigerated briefly at this point while you make your glaze.

Hard Caramel Glaze:
1 cup (225 g.) sugar
½ teaspoon lemon juice

Combine sugar and lemon juice in a saucepan with a metal kitchen spoon stirring until the sugar resembles wet sand. Place on medium heat; heat without stirring until sugar starts to melt around the sides of the pan and the center begins to smoke. Begin to stir sugar. Continue heating, stirring occasionally until the sugar is a clear, amber color. Remove from heat immediately; place bottom of pan in ice water to stop the cooking. Use immediately.

Assembly of your Piece Montée:
You may want to lay out your unfilled, unglazed choux in a practice design to get a feel for how to assemble the final dessert. For example, if making a conical shape, trace a circle (no bigger than 8 inches) on a piece of parchment to use as a pattern. Then take some of the larger choux and assemble them in the circle for the bottom layer. Practice seeing which pieces fit together best.

Once you are ready to assemble your piece montée, dip the top of each choux in your glaze (careful it may be still hot!), and start assembling on your cake board/plate/sheet. Continue dipping and adding choux in levels using the glaze to hold them together as you build up. (You may want to use toothpicks to hold them in place – see video #4 below).

When you have finished the design of your piece montée, you may drizzle with remaining glaze or use ribbons, sugar cookie cut-outs, almonds, flowers, etc. to decorate. Have fun and enjoy! Bon appétit!

Ingredients:

For the Vanilla Crème Patissiere (Half Batch)
1 cup (225 ml.) whole milk
2 Tbsp. cornstarch
6 Tbsp. (100 g.) sugar
1 large egg
2 large egg yolks
2 Tbsp. (30 g.) unsalted butter
1 Tsp. Vanilla

Dissolve cornstarch in ¼ cup of milk. Combine the remaining milk with the sugar in a saucepan; bring to boil; remove from heat. Beat the whole egg, then the yolks into the cornstarch mixture. Pour 1/3 of boiling milk into the egg mixture, whisking constantly so that the eggs do not begin to cook. Return the remaining milk to boil. Pour in the hot egg mixture in a stream, continuing whisking. Continue whisking (this is important – you do not want the eggs to solidify/cook) until the cream thickens and comes to a boil. Remove from heat and beat in the butter and vanilla.

For Chocolate Pastry Cream (Half Batch Recipe):
Bring ¼ cup (about 50 cl.) milk to a boil in a small pan; remove from heat and add in 3 ounces (about 80 g.) semisweet chocolate, finely chopped, and mix until smooth. Whisk into pastry cream when you add the butter and vanilla.
For Coffee Pastry Cream (Half Batch recipe)
Dissolve 1 ½ teaspoons instant espresso powder in 1 ½ teaspoons boiling water. Whisk into pastry cream with butter and vanilla.

Thanks go to Cat for choosing this month's challenge and to Lisa of La Mia Cucina and Ivonne of Cream Puffs in Venice, the creators of the Daring Bakers' challenge. To check other daring bakers' creations, please check the daring kitchen's site.

Sunday, May 16, 2010

The Making of a Cake


I have been making cakes for friends and clients for a while. This doesn't happen too often, but once in a while I get asked. While I didn't go to baking school, I had some "formal" training on cake decorating while working for this insane but very talented woman who will remain unnamed. She made very traditional French cakes, and her decorating techniques were amazing. Decorating cakes is such a work of patience and you need hours and hours of practice to get the manual skills you need to execute perfect piping. I am a little of a perfectionist so it is really stressful to decorate a cake because I keep trying to get that perfect smoothness and perfect edges. By no means I am good, and I haven't mastered any of the designs that some people like on their cakes, however I can make cakes that taste really good and are simple but beautiful.

Throughout the years I have learned that planning is essential for my sanity and to avoid disasters. The more prepared I am the better the end result (sounds simple, right?). The cake layers are made two days before the event (this in case a baking disaster happens and I have to start again), assembled the day before, chilled for hours in the fridge so the flavors can come together. The cake is then crumb coated, chilled again, and frosted with a rough layer. The day of the event, the cake is "polished" and any final decorations are piped on. Then comes the most stressful part, the delivery. Moving the cake to the car is the first hurdle, then comes the ride of the precious cargo, then the walk from the car to the final destination. Imagine walking in slow motion, checking steps, people around you, doors that can swing open at any minute, all carrying a very heavy cake and sweating cold bullets. The sense of relieve when you finally lay that baby down and you admire the final product is priceless.

I made this cake for a very special person, a woman I met when she waited tables at a restaurant where I worked six years ago. She was my favorite person there, her attitude was remarkable, without an ego and no sense of entitlement, a very mature young person indeed. She is also a phenomenal babysitter, who comes with two huge tool boxes full of things to make fun projects with the kids. She also believes in saving and recycling, and uses salvaged items for her art work. She chose a vintage dress for her special day, how cool is that? She is also always smiling, I actually think that she walks few inches above the ground, I kid you not.


When she asked me to make this cake for her wedding I was really touched, and I put lots of love into it. The cake consisted of a lemon raspberry bottom tier and two tiers of chocolate cake with a chocolate mousse in between. Then I made a second little cake because she also wanted an amaretto cake. I always fear that the cake I made was not perfect, so I was waiting patiently to hear back from her. Bre loved the cake and since she didn't get to try the amaretto cake I promised to make one for her first wedding anniversary.


Congratulations Bre!

Tuesday, April 27, 2010

Daring Bakers-British Pudding


This month I am late, surprised? I even considered not participating this month because I don't have much time but then I thought that this challenge can be made pretty simple, and since I never made a steamed pudding I was intrigued. The upside is that we can have dessert for dinner tonight. Here I am at 5 PM pacific time waiting for the pudding to finish steaming. There isn't much sun so I am not sure of the quality of the photos I will take.

The April 2010 Daring Bakers’ challenge was hosted by Esther of The Lilac Kitchen. She challenged everyone to make a traditional British pudding using, if possible, a very traditional British ingredient: suet.

Traditionally British pudding is made either with a pastry shell or as a steamed spongy cake. The pudding can be sweet or savory. The must have ingredient is suet, which is the fat that surround the kidney of the cow. I had to pass on the suet because I was sure not to find it in my town, and I didn't have time to look for it. Esther included a recipe for a steamed sponge pudding that calls for bread crumbs but since it didn't sound too appealing I went to one of the web sites she suggested and found this recipe which calls for butter.


I steamed the pudding into heat proof ramekins covering the tops with a piece of parchment paper like the recipe describes. The pleat is important because the pudding expands while cooking. After 30 minutes the center were still uncooked so I steamed them for 1o more minutes.


Strawberry Rhubarb Steamed Pudding

Ingredients

  • 200g caster sugar
  • 125g unsalted butter
  • lemon zest
  • 2 medium eggs , beaten
  • 175g flour
  • 1 tsp baking powder
  1. Cook the rhubarb and the strawberries with sugar to taste over a gentle heat until thickened. Remove from heat.
  2. Grease a 900ml pudding basin. Put butter and remaining sugar in a bowl and cream together. Stir in vanilla extract, then beat in eggs, a little at a time. Sift in flour and carefully fold into the mixture.
  3. Spoon some jam into the bottom of the basin, then spoon the sponge mixture on top and level off surface.
  4. Butter a piece of greaseproof paper slightly bigger than the top of the pudding basin. Make a pleat in the center and secure over the top of basin. Repeat with a piece of foil, then secure the whole thing with string. Place in a pan half filled with simmering water. Cover and cook for 1½ hrs, checking regularly that the pan does not boil dry. Remove cover, invert the pudding onto a plate, then carefully lift off the pudding basin. Serve with crème fraîche or single cream.

To check other creations and find the original recipes, please check the daring kitchen's site.

LinkWithin

Related Posts with Thumbnails