Showing posts with label Tarts. Show all posts

Tuesday, October 4, 2011

Fig Hazelnut Mini Tarts-Gluten Free


Do you believe in fate?  I believe that sometimes things are meant to be, but I can't explain why.   I recently lost a non baking prospective job, I am not even sure how it happened, likely due to a not so clear e-mail exchange.  Fate wanted that the same day I scheduled an interview with a woman who is opening a bakery in my town, ten minutes walking distance from my house.  Maybe there is a bakery job in store for me, and it would have been impossible to accept it if I had started at the other job.   I also applied to become a Master Gardener and with the prospective job I wouldn't have been able to do it, so maybe it was meant to be.

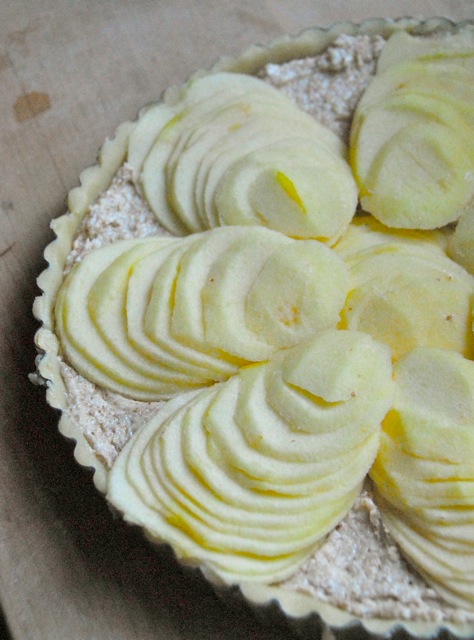
I think fate wanted me to try this recipe.  I had some figs left from a tart I made on Saturday, and was wondering what to do with them (besides stuffing them in my mouth).  While trying to stuff organize more recipes in my overflowing recipe box, a little recipe card literally jumped out at me.  I originally found it in Martha Stewart magazine, get this...in October 1995, and because it looked so good I kept it but forgot all about it for sixteen years, and four moves later fate wanted me to find it again, when figs are in season.


 Had I found it in January I would have put it back in the box and forgot it again, don't you think?  Are you a believer now?

Since the original recipe contains only two tablespoons of flour I knew it would be a great recipe to adapt and make gluten free.


Below you can find Martha's recipe with few changes I made.  The original recipe calls for brandy and ground pepper but I skipped both.  This is such a versatile recipe, and I plan on using it with other nut and fruit combination, pistachios and cherries come to my mind for example.

I lettori Italiani possono trovare la ricetta tradotta in basso.  La ricetta originale contiene farina,  l'ho trasformata in una ricetta priva di glutine usando 50:50 farina di riso e amido di mais a parita' di dosi.

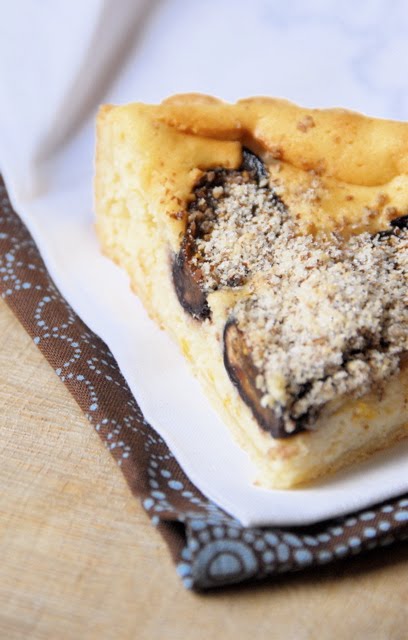
Fig and Hazelnut Tart
Makes four 4" tartlets of an 8" tart

8 figs, preferably Black mission
1 1/2 cup/200 gr skinned hazelnut, toasted*
1 tablespoon rice flour
1 tablespoon corn starch
1/2 cup confectioners' sugar, plus more for sprinkling
1 large egg plus an egg white
2 tablespoon/1 oz unsalted butter, melted and cooled
2 teaspoons lemon zest
1/2 teaspoon salt
  1. Heat oven to 350F . Cut 6 figs into 3/4-inch dice. Set aside in a bowl.
  2. In a food processor, process nuts until medium fine. Sift together rice flour and 1/2 cup confectioners' sugar; add to nuts; pulse to combine. Add egg, egg white, butter, and zest. Process to combine, about 10 seconds. Add batter to figs, and mix together.
  3. Spray four 3 3/4-inch (or one 8-inch) tart pans with vegetable-oil spray. Divide batter evenly among the pans. Cut remaining 2 figs lengthwise into six slices each. Arrange three slices over each tart. Place tart pans on a baking sheet. Bake until tarts are set and golden brown, about 40 minutes (for individual tarts or one large tart). Remove from oven and cool slightly. Remove tarts from pans, sprinkle with remaining sugar, and serve.
*If you can't find skinned hazelnuts, toast them at 320F for 10 minutes, then using a kitchen towel rub them against each other until the skin comes off.  It won't work for all the nuts, but it is okay because whatever skin is left it will impart flavor too.   Return the nuts to the oven and toast for another 10-15 minutes.

If you are like me and you can't get enough figs, here are more recipes using this amazing fruit:
Fig raspberry crostata with linzer crust
Fig tart from Chez Panisse
Ricotta fig tart
Focaccia with figs


Crostata di fichi e nocciole

8 fichi, preferibilmente neri
200 gr nocciole spellate
10 gr  farina di riso
10 gr amido di mais/maizena
60 gr zucchero a velo
1 uovo piu' 1 albume
30 gr  burro, sciolto e raffreddato
2 cucchiaini di scorza di limone
Mezzo cucchiaino di sale
  1. Riscaldare il forno a 180C. Tagliare 6 fichi a dadini.
  2. Macinare le nocciole con lo zucchero e la farina fino a risultare in una farina fina (aggiungendo la farina si fa si che le nocciole non si trasformino in burro). Incorporare il resto degli ingredienti, mescolare bene, e aggiungere i fichi a dadini, e mescolare bene.
  3. Imburrare bene quattro mini formine da crostata o una da 20 cm. Dividere il composto tra le formine.  Tagliare i due fichi rimasti in 6 fette in lunghezza.  Disporre tre fette per ogni mini crostata.   Trasferire le formine su una pirofila da forno, e cucinarle fino a che le crostate sono dense e dorate, 15-20 minuti.   Lasciare raffreddare, rimuovere le crostate dalle formine e spolverare con ulteriore zucchero a velo.

Wednesday, April 27, 2011

Daring Bakers-Pecan Tarlets with Maple Mousse


It is that time of the month again, the 27th, and I am ready! This month's challenge was to create edible receptacles for the maple mousse we were given to try. I especially liked the recipes of this challenge because there is no gluten involved. Evelyne provided us with the recipe to make nut cups for the mousse, and I also tried a mini tart recipe I have had in my "to try" folder, which is also gluten free.


The April 2011 Daring Bakers’ challenge was hosted by Evelyne of the blog Cheap Ethnic Eatz. Evelyne chose to challenge everyone to make a maple mousse in an edible container. Prizes are being awarded to the most creative edible container and filling, so vote on your favorite from April 27th to May 27th at http://thedaringkitchen.com!


Evelyne, a Quebec native, gave us few suggestions for the "containers", one included bacon. I have to say, despite liking savory desserts I am also very traditional, and bacon is not something I have tried in desserts, I can't quite go there (can I also confess without offending anyone that I am not really fond of bacon?). She also gave us a recipe for nut cups which were super easy to make and tasted great....did I mention gluten free?


I decided to use two flavor combinations, maple/pecan/banana, and maple/coconut/lemon/blueberry. For the first combination I used pecans for the nut cups, sautéed some bananas with sugar, a little butter, and rum, and then topped the mousse with chocolate pecan dragées. For the coconut combination I made a Meyer lemon curd and used blueberries to balance the sweetness and add color.


I wish I remember where I found the recipe for the coconut tartlets, I normally write the source next to the title, not this time. I apologize to the author for not giving the credit. Both mixtures for the cups came together in no time, the only drawback is that the edges are not perfect, but I like rustic anyway.


For the recipes and to see other wonderful creations check out the daring bakers site here.

Coconut tartlets
3 egg whites
3 cups unsweetened coconut
3/4 cup sugar

Mix all the ingredients together. Press 1 inch balls into mini muffin pans sprayed with no-stick spray. You can use your fingers wet with water, or a mortar pestle if it fits the cups. I only made a third of this recipe and I got about 16 mini tartlets on a mini muffin mold.

Meyer Lemon Curd
adapted from Passion for Dessert

3 whole eggs
3 yolks
3/4 cup sugar
1/2 cup Meyer lemon juice
Zest of two lemons
1.5 oz unsalted butter

Mix the eggs and the yolks with the sugar, add the juice and the zest, mix well. Cook on a double boiler until thickened. Add the butter, stir to melt, and refrigerate, covered. I only make a third of this recipe and it was enough for the 16 tartlets.

Chocolate Pecan Dragée

1/2 cup sugar
2 pounds pecans
2 tablespoons butter

Heat the nuts in a warm oven. Caramelize the sugar to a deep amber color, add the warm nuts, coat well, turn the flame off, and add the butter. Mix until all the butter is melted and the nuts are well coated. Spread on a silpat-lined pan and divide the nuts from one another, until they don't stick together any longer (wearing latex gloves helps with the heat). Cool completely and store in an air tight container. Warning, these are addictive!

Melt some 60% chocolate over a double boiler and pour just few tablespoons on the cooled pecans. With a spatula mix the nuts until well coated, and chill. Repeat this coating 8-10 times, mixing well after every chocolate addition to avoid the nuts to stick together. Once the nuts look uniformly coated dust with cocoa powder. The secret is only to add just a spoon full to two of chocolate every time to allow a very thin coat. By stirring the nuts while the chocolate cools you create a nice dull thin coat.


My notes:
* I sprayed the mini muffin pans with no stick spray and that worked well.
* To help press the nut and coconut mixture into the pan I used a marble pestle that was the right size, and kept dipping it in water to avoid sticking. If you don't have anything of the right side you could press them with your hand and wet finger tips.
* I baked the tartlets like the recipe suggested but ended up lowering the temperature quite a bit to allow the bottom to cook without burning the edges.
* Reading few posts of the other bakers in the DB forum I realized that the mousse was too sweet. I decided to cut down on the amount of maple syrup in the recipe to just a cup and withholding some of the gelatin. The amount of mousse was really large, and I had leftovers after filling the 16 mini tartlets.
* The nut bowl recipe made 16 or so mini tartlets.

This was a fun challenge and I loved to see all the amazing creations of other daring bakers. Thank you Evelyne for choosing this month's theme and thanks to Lis and Ivonne, the wonderful creators of this group that keeps us pushing deadlines and gives us the spark to try something new every month.

Saturday, November 27, 2010

Daring Bakers-Apple and Lavender Crostata

I finished on time this month, yeah! Ironically, I made the same crostata for Thanksgiving but forgot to take a picture of it, and probably it was for the better as by the time it came out of the oven there was no day light to take a picture of it. I served it with caramel ice cream, and it was devoured. This tart went in the oven that it was almost dark so the pictures are really bad, plus it is really hard to take pictures of brown food, see the difference with the rose photo, taken at the same time.


The 2010 November Daring Bakers’ challenge was hosted by Simona of briciole. She chose to challenge Daring Bakers’ to make pasta frolla for a crostata. She used her own experience as a source, as well as information from Pellegrino Artusi’s Science in the Kitchen and the Art of Eating Well.

Not sure how to fix the following format, I tried everything, short of rewriting the post, not sure how it happened, apologies.....

When people ask me what my specialty is as a pastry chef I immediately say tarts and cookies, so I was happy to have the excuse to make a crostata for the DB challenge, I will never tire of them. A crostata is essentially a tart, in Italy we mostly make two types, the classic version with pastry cream and fresh fruit, and the one with jam and a lattice top. Because of my love for fresh fruit tarts (crostate), I started making them in college whenever I was going somewhere for dinner, soon I was making them all the time, just so I could eat them. Crostate sealed my fate I believe, as I started trying different versions and never stopped. I believe that what attract me of this dessert is the endless variations. The crust can be flavored by adding lemon zest, vanilla, or ground nuts, and it can be baked blind or with the filling, depending on the recipe. The sky is the limit when it comes to the filling, as you can see from the many versions of other daring bakers. You can find the complete recipe here.

Simona, whom I first met in cyber space and then in real life, gave us two versions of pasta frolla to try, and complete freedom when it came to the filling. Pasta frolla is a type of paté sucree, and it is made by just making a mound of flour, adding the butter in pieces, and binding everything with an egg or few yolks, it comes together in minutes and it is delicious. I struggled for few days to decide what to make, since there are so many fantastic flavors I could have used. This particular tart became my favorite for a while, I first saw it in the 1992 book Savory to Sweet: Pies and Tarts, which is no longer published. I have made this tart dozen of times, it is not only stunning but also delicious. This tart comes from Normandie, a region in France where they grow apples and lavender, thus the pairing of the two in this tasty tart. The recipe for frangipane is mine, the one from the book is a little too rich for my taste. You can omit the lavender if you prefer (I used a tablespoon), but I urge you to try it, it goes really well with the apples.

This bad photo reminds me of pre-digital photos from the 60's, but can't do better than this

Pasta frolla

Ingredients:

  • 1/2 c. minus 1 tablespoon [105 ml, 100 g, 3 ½ oz] superfine sugar (see Note 1) or a scant 3/4 cup [180ml, 90g, 3 oz] of powdered sugar
  • 1 and 3/4 cup [420 ml, 235 g, 8 1/4 oz.] unbleached all-purpose flour
  • a pinch of salt
  • 1 stick [8 tablespoons / 4 oz. / 115 g] cold unsalted butter, cut into small pieces
  • grated zest of half a lemon (you could also use vanilla sugar as an option, see Note 2)
  • 1 large egg and 1 large egg yolk, lightly beaten in a small bowl

Note 1: Superfine sugar is often also referred to as ultrafine, baker’s sugar or caster sugar. It’s available in most supermarkets. If you cannot find “superfine” sugar, you can make your own by putting some regular granulated sugar in a food processor or blender and letting it run until the sugar is finely ground.

Note 2: There are different ways of making vanilla sugar. I keep vanilla beans in a jar half-filled with sugar until I need to use them, for example, to make vanilla ice cream. After I remove the split bean from the custard that will go into the ice cream maker, I rinse it, dry it and put it back in the jar with sugar.

Making pasta frolla by hand:

  1. Whisk together sugar, flour and salt in a bowl.
  2. Rub or cut the butter into the flour until the mixture has the consistency of coarse crumbs. You can do this in the bowl or on your work surface, using your fingertips or an implement of choice.
  3. Make a well in the center of the mounded flour and butter mixture and pour the beaten eggs into it (reserve about a teaspoon of the egg mixture for glazing purposes later on – place in the refrigerator, covered, until ready to use).
  4. Add the lemon zest to your flour/butter/egg mixture.
  5. Use a fork to incorporate the liquid into the solid ingredients, and then use your fingertips.
  6. Knead lightly just until the dough comes together into a ball.
  7. Shape the dough into a flat disk and wrap in plastic wrap. Place the dough in the refrigerator and chill for at least two hours. You can refrigerate the dough overnight.


Making pasta frolla with a food processor:

  1. Put sugar, flour, salt, and lemon zest in the food processor and pulse a few times to mix.
  2. Add butter and pulse a few times, until the mixture has the consistency of coarse meal.
  3. Empty food processor's bowl onto your work surface
  4. See step 3 above and continue as explained in the following steps (minus the lemon zest, which you have already added).

Variation for Version 1 of pasta frolla:

If you want, you can make the pasta frolla using a combination of all-purpose flour and whole-wheat pastry flour.

If you choose to try this variation, use 1 cup [240 ml, 135 g, 4 3/4 oz.] unbleached all-purpose flour and 3/4 cup [180 ml, 100 g, 3.5 oz.] whole-wheat pastry flour.


Frangipane


4 oz. butter, at room temperature
1/2 Cup sugar (100 gr)
1 egg
2 Cups ground almonds (hazelnuts would work as well)

In the bowl of an electric mixer, beat the butter and the sugar until fluffy, add the egg, and beat until well incorporated. Scrape the side of the bowl and add the ground almonds. Spread evenly in the unbaked tart shell. Frangipane keeps few days in the refrigerator and can be frozen for weeks.

Assembly:

Peel, halve, and core 4 apples (I used Golden delicious). Cut each half in very thin slices, keeping the pieces together. Sprinkle one tablespoon of lavender flowers on the unbaked shell, then spread the soft frangipane on top. Add the sliced apples fanning the slices as shown in the pictures. Bake at 350F until the frangipane is set and the apples start to color. Brush the top with diluted and strained apricot preserve to give the tart a beautiful shiny look (warm up few tablespoons of jam with a little water, bring to a boil and then strain any fruit pieces out).

Many thanks to Ivonne of Cream Puffs in Venice and Lisa of La Mia Cucina, founders of Daring Bakers, and to Simona for choosing this month's challenge.

Tuesday, November 17, 2009

Ricotta Fig Tart


More figs you say? But if you have followed me for a while, you would know that I am a big fan of this versatile fruit (see here, here, here, and here). I could eat figs every day, and now that the season of fresh figs is over I can still get my daily fix with dry figs if I need to. A neighbor has a fig tree she doesn't pick (what's wrong with her?), and I mean to contact her to see if I can do pick it for her and share the bounty, I think there are still a few on the branches. Figs and I go way back, and one of the favorite things to eat as a child where these huge, soft, drenched in corn start, figs my dad used to bring home. I owe my dad a lot of things, my love for eating is one of them.


I haven't made this tart in ages, not sure why since it is one of my favorites. I was trying to think of something new to try with ricotta, my favorite cheese to bake with, to increase my chances of winning the cheese guide and cookbook Sweet Charity is giving away. After a little search in my ever growing stack of cookbooks, I realized that many ricotta recipes were either for Easter cakes, or where kind of boring. I also remembered I still had some extra pasta frolla in the fridge so I opted to make this tart, which you have to give it a try, it is delicious! I suppose that if you are not a fan of figs (how is that even possible?), you could substitute other dried fruit, like plums, or cherries for the figs.


This recipe comes originally from my first ever cookbook I bought in the States, Spago Desserts, which I purchased shortly after moving from Venice to Santa Monica, and is one that has given me few wonderful recipes. I haven't changed the filling of this tart since I think it is perfect the way it is, but I don't use a brioche dough as the base like the book calls for. The brioche didn't work so well the first time I tried it (probably due to my inexperience with yeast doughs), and I think the tart is better and more elegant with a buttery pate sucree. This recipe introduced me to one of my favorite spices, cardamom, a spice I had never used or seen in Italy. After smelling it and tasting it in this wonderful tart I have become a total cardamom addict, I use it a lot, and one of my favorite ways to enjoy it is as an ice cream flavor, in Cardamom Ice Cream.


Make ahead notes:

*When making this tart, plan ahead, since the figs need to be reconstituted in liquor, and the tart is best served chilled. Don't skip the orange zest as it is a match made in heaven with the cardamom and it add a great dimension to the tart.

*If you can't stand the blandness of store bought ricotta, try making it at home with this recipe, it is easy and really superior to the store variety. I would also use whole milk ricotta, not the low fat or fat free versions, the end result will not be the same.

Ricotta Fig Tart
adapted from Spago Desserts

shell:
pasta frolla or pate sucree

filling:
3/4 pound dark dry figs (I use black mission)
3/4 rum or armagnac
3/4 pound whole milk ricotta
3 oz. cream cheese at room temperature
3/4 cup granulated sugar
2 whole eggs
1 egg yolk
3 table spoons lemon juice
1 tablespoon orange zest
1 tsp vanilla extract
1/2 tsp ground cardamom
pinch of salt

topping:
2 TBS almond meal
1 TBS sugar

Roll the dough to a 1/4" thickness, and transfer it into a 10" tart shell. Cut the dry figs in half, and marinate them in rum or Armagnac, until needed. In a large bowl mix the cheeses until smooth, add the sugar and mix until smooth. Add the whole eggs and the yolk, one at a time. Add the lemon juice, orange zest, extract, cardamom and the salt. Mix just until combined. Poured the filling into the tart shell. Drain the figs and arrange onto the filling, without letting them sink. Bake in a 350F pre-heated oven for 10-15 minutes, then add the almond meal mixed with the sugar. Keep baking until the filling is firm to the touch and lightly golden, another 20 minutes or so. Cool on a wire rack and then chill until ready to serve.

Tuesday, September 8, 2009

Fig Tart-Pure Buttery Bliss

First came the fig, then the tart, followed by pure buttery bliss. Fork is optional, eating with your fingers is allowed.


I am truly enjoying the fruits of late summer, like tomatoes, pears, and figs. This tart is one of the best things I have eaten in my life, complete sensory satisfaction. For the recipe and the procedure follow the method for the rhubarb tart, just add quartered figs, no extra sugar is needed.

Monday, July 6, 2009

Fig Raspberry Crostata


I mentioned this crostata before, it is amazing, beautiful, and tasty. The filling has figs and raspberries, an unlikely combination that works perfectly. I have many memories related with figs, which grow almost wild in Italy. My first and not too fond memory of figs was of the smell of rotting fruit fallen from a huge, ancient looking tree. This tree grew in the back of a fort, left over after WWI, located in a tiny island in the Venetian lagoon, called Isola di Crevan. We used to sail to the island to join our friends whose relatives owned this tiny paradise, and spent amazing weekends, hiding, jumping off the dock, eating cherries from the trees.

Like I mentioned before, there is a short time where you can find the first figs a tree produces in the spring, to be followed in the fall by a second more bountiful crop. I was able to find organic figs that were not too expensive so I had the perfect excuse to make this.


The recipe comes from Baking with Julia, and the contributing baker is Leslie Mackie. If you don't know this book, it is a trove of recipes, most very rustic and delicious. Maybe I should start a Baking with Julia challenge. Like...I have the time.


The crust has almonds in it and is delicious. I changed the recipe a little because the original recipe had too much butter and the crust was impossible to work with. The following recipe is plenty buttery but less sticky. The dough is still very soft and in fact can be pressed directly into the tart mold, but to cut the lattice strips I advise you to roll the dough and freeze it before cutting it. The other thing I did was to skip the sesame seeds in the crust, somehow I thought they were an over kill. The filling is almost the same with slightly less sugar.


The tart tasted even better with the lemon verbena ice cream I made the other day.


Almond Tart Dough
9" lattice tart

2 eggs
1 teaspoon vanilla extract
1 1/4 cup unbleached almonds
1/2 cup sugar
2 cups all-purpose flour
1/4 tsp salt
Zest of one lemon
6 oz cold butter, cut in 1/2" cubes

Whisk the eggs together with the vanilla extract. Process the almonds with a tablespoon of sugar until they are finely chopped. Add the remaining sugar, flour, salt, and zest and mix just to combine. Add the butter and mix until the mixture resembles fine crumbs. Add the egg mixture and mix only until the dough is uniformly moistened, 15 seconds. Fully blend the ingredients by hand mixing gently a couple of times. Divide the dough in two unequal pieces (the smaller will be used for the lattice top). Press the bigger piece into the tart mold and freeze. After the rest of the dough has chilled for an hour, roll it in between two pieces of parchment paper until 1/8" thick. Freeze until ready to use.

Fig Raspberry Filling

12 oz. Figs, quartered
12 oz. Raspberries
1/3 cup granulated sugar
1/4 cup brown sugar
1 1/2 tablespoon flour
1/2 teaspoon lemon zest
1 tablespoon butter

Put half of the fruit in a heavy bottom sauce pan and cook with the rest of the ingredients until bubbly. Turn the heat off and add the rest of the fruit. Chill completely before adding it to the tart.

To assemble the tart:
Add the filling to the frozen tart. Cut the frozen rolled dough in 1/2" strips, and use them to make the lattice top. Sprinkle with crystal sugar and bake at 350F until bubbly, rotating once.

Tuesday, April 14, 2009

Tart with Leeks and Zucchini-Crostata ai Porri e Zucchine

A very cold weather front has hit the Bay Area, the temperature is ridiculously cold, but Spring is here nonetheless. My vegetable garden is in its third year and I am still learning what works and what doesn't. Last fall I planted loads of garlic since it grew really well before, and for the first time I tried leeks which proved to be a good crop too. The garlic bulbs haven't formed the little segments yet, so they need more time in the soil but he leeks are now big enough to justify harvesting them and that is what I did this morning. A tart that could be brought to a summer pic-nic is the perfect ending for these beauties.


Italians don't have the same love affair French have with leeks, so this vegetable doesn't appear too often on the menus. Maybe it is on the account on how we call them, Porri, which doesn't sound too appealing. This tart came to being when I was trying to use some leeks I had bought before knowing what to do with them. I decided to use them in a tart and since my fridge always has zucchini waiting to be used for one thing or another, the zucchini-leek combo was born. I then spiced the filling up with some chili flakes, added cream, eggs, some cheese and voila', a new dish was born. I have to admit the tart sounds/is very French indeed, but Italians will approve I am sure, especially since I used Parmigiano Reggiano.


This is another crowd pleaser I like to bring to parties or make for my catering clients. The tart dough is a typical Pate Brisée, with lots of butter and so delicious. The recipe is adapted from volume I of Mastering the Art of French Cooking by the venerable Julia Child.


Pate Brisée

2 cups of all purpose flour
1 teaspoon salt
1/4teaspoon sugar
6 ounces butter cut in small cubes
1/2 cup ice cold water.

I like to make this dough in a food processor as it is very quick. Add the dry ingredients to the bowl of a food processor, pulse to combine. Add the chilled butter and pulse on and off until the butter is the size of peas. Add the cold water with the machine running, then pulse on and off until the dough start to come together. Small pieces of butter should still be visible. Empty the dough on a floured counter and bring it together, do not over mix it. Wrap in plastic wrap and chill for 2 hours. The dough can be frozen for few weeks. Roll the dough to a 1/8 thickness, line a tart shell and freeze.

Tart Filling

2 medium leeks
2 medium zucchini
EVOO
chili flakes (to your taste)
parsley, finely chopped
1 cup heavy cream
2 large eggs
1/2 cup grated parmesan cheese
salt and pepper to taste

Slice and wash the leeks in cold water (click here to see a detailed post on how to prepare leeks). Heat the EVOO in a large pan, add the leeks and cook until translucent (like you would with onions). Add the zucchini and cook on medium heat until tender, seasoning with salt and pepper. Add the chili flakes and the parsley, and let cool. Mix the heavy cream with the eggs, add the cheese, and season with salt and pepper. Mix the cream mixture with the cooled vegetables and pour onto prepared tart shell. Bake at 375F until the filling is set and the crust is nicely browned. The above amounts will work for a 10", or a 8"x11" tart.

Buon Appetito!

LinkWithin

Related Posts with Thumbnails